Showing posts with label lightweight camping. Show all posts

Monday, 21 May 2018

A beginners guide to tarps

Bonfire Near Grass Field during Dawn

Tarp Shelters
I thought I'd write a bit about one of the most basic, overlooked and old fashioned bits of gear around, the simple tarp.
On trips I've always liked to sleep out on the ground or under improvised shelters of one type or the other, while it seems every single friend of mine has preferred a tent.
But in this day and age of ultra-high-tech, expensive, high-speed-low-drag, designer label, not-just-lightweight-but-ultra-light and over-complicated gear, I find it enjoyable and useful to get back to basics now and then.
After all, one of the reasons I enjoy the Green World so much is that it is an escape from the complicated world we humans have created for ourselves, and once in a while it's nice to leave the complications behind.
Certainly, I think it's a good idea that every outdoors-person should be well enough acquainted with this simple yet versatile piece of gear to be able to readily fashion one into a comfortable shelter in a short period of time.
I think it's a good idea to introduce young people just starting out camping to this type of shelter first. This gives them proper training and a grounding in shelter making basics, and accustoms them to sleeping in a more open environment, as I really think most peoples insistence upon tents is almost entirely psychological.

So what are some of the advantages of a simple tarp shelter?

Low Cost.
No other portable shelter is as inexpensive, which is a great advantage for young folk just starting out as well as refugees the world over.
Also, if one looses interest in camping, you haven't wasted much coin.

Low Weight.
Tarps are lighter then tents, sometimes much less so depending upon what material the tarp is made out of. This single fact alone is reason enough to make the tarp an ultra light backpacking favorite.

Cooking.
You can easily cook under one, A great rainy day advantage.
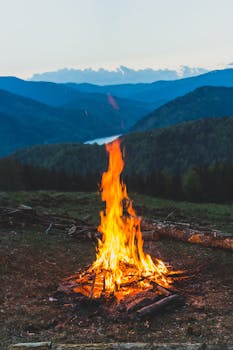
Camp fires.
Where appropriate , you can build a fire in front of one, which is nice in cold and wet weather,.
Of course you can build a fire near a tent, but those expensive nylon tents don't react well to flying sparks, and they don't concentrate the heat of a fire anyway. Burn a hole in a cheap tarp and all you have to do is simply patch it with duct tape.
A properly rigged tarp can reflect the warmth of a fire and create quite a cozy little sanctuary.

Closeness to Nature.
After all, this is why we're out there, isn't it? So why enclose yourself completely in a nylon envelope if you don't have to.
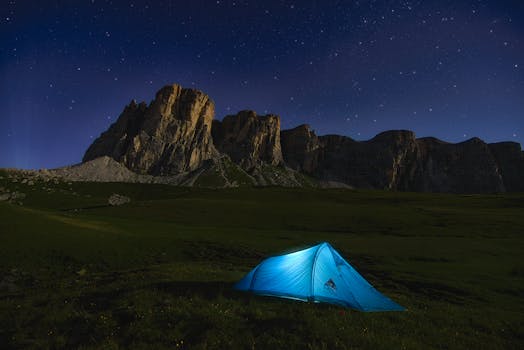
Under a tarp you can have shelter and still see the wind and rain, taste the air and see the stars. One is still part of the great outdoors.
Inside a buttoned up tent, you might as well be in your backyard.

Of course tarps are not perfect shelters. If they were tents would never have been invented.
The flip side of the tarp coin is;

Bugs.
This is perhaps the single biggest complaint of tarp shelters.
If the blackflies are so thick you get twenty calories of protein with every breath, or the mosquitoes so bad your hiking companions look pale from blood loss, then a tarp might not be the best idea.

Above The Tree Line.
It's nice to have a handy tree or two to string a tarp from. This is where the weight savings really shine.
Tarp shelters can be used in treeless areas of course, if you are willing to carry poles or spend some time looking for sticks.
But there are times when a true freestanding tent is called for, like crowded camp grounds or when a storm is trying it's level best to blow you off a mountainside, or really wet weather when the rain and wind is swirling around, constantly changing direction from every compass point, or when it's so cold out you need to conserve every last calorie of heat.

Skill.
Tarps take more skill to use. You have to know a few knots for one thing, and every time you set one up you have to decide how best to do so, taking into consideration the weather and the surroundings. You have to look for not only an nice flat spot with good drainage and no deadfalls ready to come down on it, but also handy trees, bushes, rocks or whatever to hang the tarp from. Which way is the wind blowing? Will it change direction after nightfall? Need to cut or find poles? With a tarp, taking advantage of natural windbreaks, dips in the terrain and so forth is far more important.
With a tent, you couldn't change things around even if you wanted to. All the design and engineering has been done for you, and all you do is assemble it, the same way you do every time you use it regardless of the conditions or location.

Well, with knowledge and practice comes skill., so let’s dig out a tarp and play.
The tarp I'm using here is from Harbor Freight. It's 9'6" by 7' 4" and cost me $6.99. According to harbor freight it weighs 1-3/4 pounds, but I didn't weigh it.
I think this is a decent size for a nice solo shelter.
If facing really bad weather or new to tarp shelters bigger is better, but inexpensive woven poly tarps are kinda heavy for their size. Something on the order of 8’ x 10’ seems like a good compromise.

Tarp, plenty of para cord, ground sheet, and eight stakes. Weight for the mess is just a tad over three pounds.


P7140076.jpg

Three pounds isn't bad for the weight of even a solo shelter, but it really isn't any better than many solo tents. If we were using an expensive coated nylon tarp and simple plastic ground sheet we could cut a pound off this weight, and if one spent the coin on a Silnylon tarp we could really get the weight down. Still, this cheap tarp will do nicely for several seasons if well cared for, and you can outfit a whole scout troop for the price of a single solo tent.

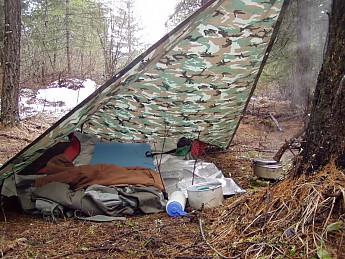
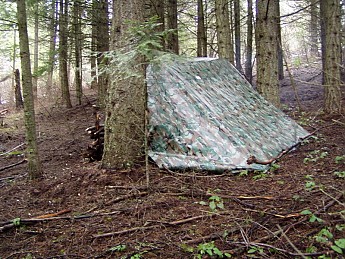
This first pitch is sometimes called the diamond pitch. It's one of my favorites because it's so easy to do and really blocks the nasty weather.
So you find yourself walking along in high wind and maybe rain, and are fixin' for a break. This is so fast to rig there is no reason not to put up the tarp this way even for a lunch break.
Start looking for a likely looking tree with a flat spot before it.
Put your back to the wind and walk right up to that tree, and drop your pack, leaning it against the handy tree.
Open the top of the pack, and take out your tarp. Tie a corner of the tarp to the tree. Of course, you already have short cords tied to the corner holes in the tarp, so this is done without having to fumble cord out of the pack. Grab your bag of stakes out of the pack.
Now walk backward into the wind, pulling out the tarp as you go, and stake down the opposite corner of the tarp firmly.
Now the tarp is captive, and although it may flap a bit the battle is over. Now stake out the two sides of the tarp and you’re done!
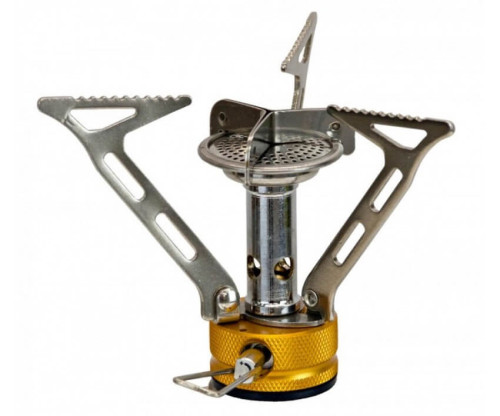
Get under it, spread out the ground cloth, open your mattress pad and relax. Light the stove and cook dinner or lunch.

Like many tarp pitches, this probably works better with a square tarp. With a rectangular tarp such as this one side will be more open than the other.
Nothing to worry about, just angle the tarp so that side is a little more sheltered, and you put your stove there.
In really bad weather you keep the tarp pretty low to the ground. In better weather you can tie it higher to the tree for more head room under it.
It's more sheltered then it looks. What you get looks something like this -

P7130055.jpg

Next, we should mention one of the oldest and most basic pitches, the simple A pitch.
This is simplicity itself. Just stretch a rope from two handy objects, throw the tarp over and stake it out.
With a well tensioned rope and eight stakes, this is perhaps the sturdiest pitch there is, and it probably provides the best shelter.
One open end can be mostly closed simply by pitching that end of the tarp real close to a big tree or bush. The opposite end can be blocked with your pack or rain gear as needed.
It is nine and a half feet long though, so little rain will blow in and reach you.
What this doesn't have is much head room, so it's better for sleeping then for cooking or other camp chores.
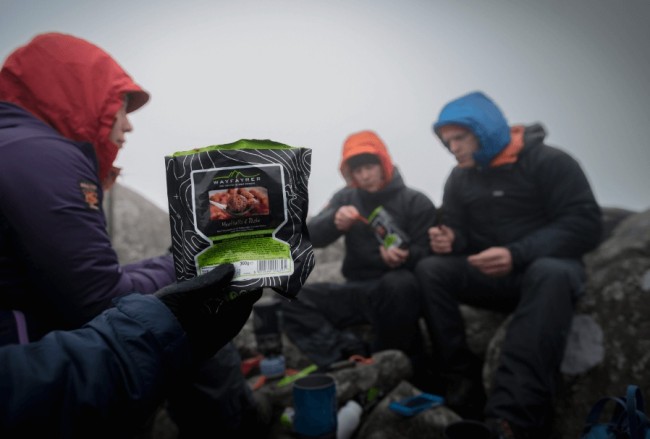
Recently I slept under a tarp like this with my three nephews. Two people per opening, and our feet met in the middle. It worked very well and was a very simple and lightweight way to shelter four people.

P7130056.jpg

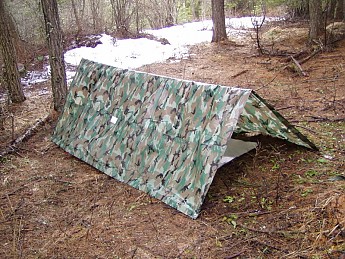
Not much headroom, but pretty cozy in there
P7130057.jpg
 -
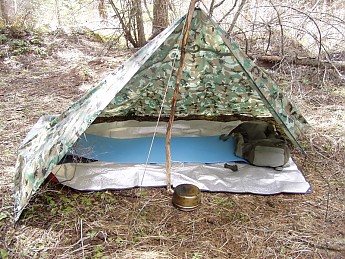
What if you find yourself in open terrain without any trees handy? Well, you’ll have to find a stick or two.
For a one-stick pitch, stakeout one long edge of the tarp first. Then lift the center of the opposite long edge with the stick, and hold it upright with cord and a two stakes set in a V. I think of this as the Pyramid Pitch.
With this particular tarp there is no center grommet, so I cheated and my pole isn't centered, so one side doesn't reach the ground.
I may have to put a new grommet in the center of this tarp and experiment more with this pitch, it looks promising, but to be honest I’ve never spent the night under this arrangement

P7140074.jpg

One long, sturdy stick can also be used for the diamond pitch show at top, and with two sticks and plenty of cord and stakes or other things to tie the cords off to, one can also manage an A pitch. The A pitch is by far the hardest to do without trees though, because the ridge line needs to be pulled very tight for it to be sturdy, and your end sticks will want to fall over unless staked or tied up very firmly. When using sticks I’d stay with some sort of one-stick pitch unless I had lots of practice first.

Now we come to an oldie but goodie.
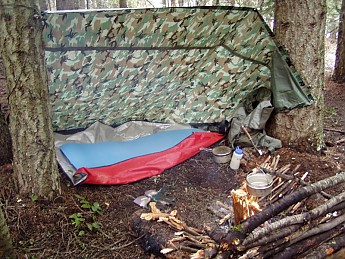
This is the lean-to pitch.
Using a cord suspend one long edge between two trees.
Pull the tarp out at a 45 degree angle, and stake down the opposite side.
I modified the pitch here, and folded one side over for a corner.

P7130064.jpg


This pitch is more open than the others but it is an all-time favorite if you are in an area where you can build a fire.
With a bright fire before the tarp the heat is nicely concentrated by the tarp and it's very warm.
The little wall behind the fire not only reflects some heat, but helps create a backdraft and keep the smoke out of the shelter.

P7130062.jpg

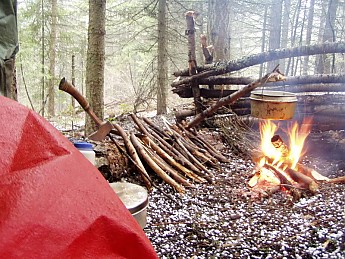
Ah, this is the life. Now all camp chores can be done sheltered and warm. It was so comfortable here relaxing with my boots and coat off that I almost fell asleep.
Then the wind changed...
As I was relaxing the gentle breeze picked up and changed direction. The shelter filled with smoke. No worries, you have to be philosophical about this sort of thing.
Ah well, nothing is perfect.
I rolled over and faced the back of the shelter where there was no smoke. My eyes closed...
And a flash lit the shelter, clearly visible though my closed eye lids!
Huh? someone taking a picture with a flash?
KABOOM!!
Nope. That was thunder, and close by! The lighting struck, the thunder boomed, and marble sized hail stones came down in a torrent and bounced all around.
I pulled the edge of the ground cloth over me to keep off the ricochets.
Camping with a tarp shelter I think it is a good idea to use an oversized ground cloth that can go around your sleeping bag!
So I lay there before my fire and watched the storm, warm and comfortable, with the whole forest open before me.
Nope, you don't get a view like that in a tent.

P7130070.jpg

You can spend allot of coin on fancy modified tarps. They look like bat wings, A frame tents without the walls, pyramids with a central pole, and just about every shape imaginable. Although they certainly are lighter than a woven poly tarp of equal size, are they really any better shelters?
Properly setup and used, they all will keep you dry in a rainstorm and let you cook a meal over your stove. None will protect a person from bugs, and that is the biggest complaint I hear about tarp shelters, and none will match the versatility of a simple square or rectangular tarp, once you learn to use it properly.  
OK everyone, let’s see your tarps and hear your tarp-ing stories!

Thursday, 3 May 2018

Wild camping with minimal kit – it’s bivvy marvellous!

Wild camping with minimal kit – it’s bivvy marvellous!

thumb_IMG_5278_1024Sometimes you just want to escape! Thinking about wild camping can be more fun than the actual experience…unless you get the equipment right. There’s no better way to enjoy it than getting out there with the bare minimum. And that means a decent bivvy tent or a bivvy hammock.


Wild camping should be light camping – the minimum of stuff to carry and the right kit so that discomfort doesn’t mar the sense of freedom. We love bivvying (and especially bivvy hammocks). You can throw a bivvy bag into a rucksack or pannier for hiking and cycling trips. You can pack a couple in the campervan for off-site spontaneous nights or to make the most of beautiful places that don’t allow vehicles.
Bivvying, bivvi-ing or bivouacing is simply sleeping outside without a tent. A sleeping bag and a mat is the most basic kit you’ll need, but weather (and even dew) will usually persuade you to invest in a bivvy bag and perhaps a tarp for over the top. See our article on tarps here, by the way.

Off-ground bivvy hammocks

For us, this is one of the best options, providing you get a flat bed hammock. You can read a full review of these bivvy hammocks.
The Lawson Blue Ridge is now one of our favourites because you can use it in the trees or on the ground.
Our favourite was the Amok Draumr 3.0 with bug net. So neat, small and easy to put up. It’s got two BIG advantages. You can sleep flat rather than bent in the middle, and if you pull two straps, it instantly converts into a comfortable hanging chair. It has a removable zip-closure mosquito net that sits well above your head. A camping mat needs to be slipped into the special sleeve, which keeps the hammock flat and provides insulation.
For a cheaper option, the Hammockbliss Sky Bed with bug net isn’t bad either.
The latest we’ve tried is the  Lawson Blue Ridge – fairly affordable and super-easy to put up. It’s big selling point is that you can use it on the ground as well as in hammock-mode. It’s also much roomier than any we’ve tried and comes with a mosquito net (built-in) and a detachable rainfly/tarp. It doesn’t come with tree straps…you’ll need to get those separately. Not absolutely flat-bed, but comfortable with a sleeping mat inside.
There are plenty of other hammock bivvies to consider if you don’t mind the slumpy slumber – and they start from around £20, so a huge saving. We haven’t tried any of these (although we have slept in an ultralight and strong Ticket to the Moon hammock with a regular mosquito net over the top, and it just about worked). For ultimate bug-freeness, TTTM also sell a 360-degree mosquito net that fits around the hammock properly. We tested one of those and the difference was worth it, though there was an issue with the tightening toggles and it is slumpy.
For an ordinary hammock, get yourself a Klymit hammock pad…they make all the difference. The extra side bits keep the fabric from engulfing you and the insulation keeps your back and bum warm.
There are also Tentsile tents, which need three trees to keep them taut. They look great (though not a cheap option). We haven’t been able to try them out yet, so can’t recommend at the moment. Our concern would be that they’re not so discreet and quick to set up.
If you can’t get flat sleep in the trees, then choose a good ground bivi tent…read on.

Ground-based bivvy bags and tents

The most basic bivvy bag is simply a waterproof cover for your sleeping bag. Our choice, however, would be a bivi tent with a hoop at the head to give you breathing space.
Remember, though, that nearly all bivi bags will have some condensation in them come morning. It’s one of the reasons we like the hammock and tarp option better. Though read on for Aqua Quest’s West Coast and Lawson’s Blue Ridge recommendations – both bivi tents with lots of airflow.

Aqua Quest Hoopla

The smartest-looking bivvy we’ve tested, and also the best for getting into and for ventilation. It weighs around 1100g, complete with pegs (not quite enough supplied) and a snap-together pole for the hoop. It’s roomier than many options, but a thick mat makes it had to sleep without your feet pushing against the fabric.
The reason it gets our vote is the side entry zip and the option to have just the mosquito mesh between you and the sky. Fully waterproof, of course, and there’s a transparent window so you don’t feel buried when you’re fully zipped in. The foot area did get damp with condensation, but this is common to all bivvies.

Lawson Blue Ridge

As mentioned above, this is both a ground bivvy and a hammock. The clever spreader bar splits in two, so it’s not huge to pack away. You simply roll it out, peg it down with one peg at both ends and then insert the shock-corded aluminium hoops to give you head and foot room.
Lots of space, a couple of hanging loops and pockets inside, a mosquito net, zip door and a detachable rain cover. Pretty great!

Rab Ridge Raider

The Rab Ridge Raider has one hoop and head entry. It’s slightly higher at the head end for a roomier feel.
The Ridge Raider is a lightweight, waterproof single-person bivi, with one head-end (and super-easy) DAC Pressfit™ pole, it has a bathtub floor and eVent waterproof, breathable fabric. Unlike the Stratosphere by Snugpak, this bivvy really does need to be pegged (and possibly guyed) for it to be useable. The hoop doesn’t stay up otherwise.
It’s certainly sleek and minimalist, but we found the head entry a little awkward and claustrophobic. It’s just like getting into a sleeping bag. The head entry, while it does have a mesh net as an alternative to the waterproof roof, doesn’t give many options for warmer weather. On the plus side, the head height feels roomy.
It’s VERY light and VERY small, so ideal for adventure and backpacking trips where kit needs to be kept as minimal as possible. As with almost all bivvy tents, condensation can be a problem when fully zipped. The lack of ventilation at the foot end means air can’t circulate, so sleeping bags will often end up damp.

Snugpak's Stratosphere bivi tent
Snugpak’s Stratosphere bivi tent – two hoops and a full side zip.

Snugpak Stratosphere

This bivi comes with two hoops. It’s very easy to set up, using auto snap-together poles that slot into the head end. These hold the roof well above the head and also mean the bivvy can be used unpegged if needs be. There’s both mesh over the face and behind the head for better ventilation
The full-length side zip makes it feel less claustrophobic and means you can leave it open in warmer weather, though it would be great to have a mesh vent down the side too so that you could keep it airy and keep out bugs.

Aqua Quest West Coast

Apart from the bivvi hammocks, this one is the best pick for good weather wild camping and bivvying. It’s basically a mini mesh tent you can set up in a minute, and you can then string up a tarp to keep off the rain. It wouldn’t work with rain AND wind, unless you created a tarp cocoon, of course.
Its big advantage is very little condensation (there was some on the green roof section, but it doesn’t touch your sleeping bag except right at the foot). It’s also roomy and a pleasure to sleep in, looking at the stars. In a way, though, it’s not fair to compare it to the others here, which are all designed for more extreme conditions and for hardy explorers.
For us, though, simply wanting a small, light and fast ‘thing’ to sleep in when fair-weather wild camping, this is perfect.
  • Weight; 1000g
  • Packed size: 38cm x 13cm
  • Around £80 (£135 with tarp and tarp fittings)
bivvy tent
The Helium bivvy bag by Outdoor Research is a super-lightweight option at less than 500g. Head-end entry, one pole and a roomy foot end to take thicker mats and sleeping bags. Not tested by us yet, but looks promising.

Mil-Tec bivvy bag
The Mil-Tec macho bivvy bag is the business for waterproofness and breathability. You don’t need to share it with that scary guy.

How to bivvy

Thanks to Alistair Humphreys and Tim Moss for their professional bivvying advice, based on years of experience.

What is a bivvy bag and why is it a good idea?

  • A bivvy bag is like a waterproof jacket for your sleeping bag. It’s a thin, waterproof bag. You use it over the top of your sleeping bag. You’ll also find all-in-one bivvy sleeping bags.
  • A bivvy bag is cheaper and smaller than a tent.
  • It’s very discreet and allows you to sleep on tiny patches of flat ground.
  • You are not cocooned from the environment as you are in a tent. In a tent, you’re basically in a rubbish version of indoors. In a bivvy bag, you really are outside. You feel the breeze on your face, look up at the stars before you sleep and sit up to a brilliant view in the morning.
  • It feels more exciting and more wild than a tent.

81cTnw1nEmL._SL1500_The options

  • If you’re in the UK there is usually a risk of rain. The cheapest way to stay dry is with a survival bag like this orange one. The disadvantage of these is that you will realise in the morning how much vapour your body gives off in a night! Your sleeping bag will be quite damp. But for a single night microadventure they are absolutely fine. And they cost less than a fiver.
  • A step-up is a breathable bivvy bag. From around £20.
  • There are a few companies that produce very cheap bivvies made from a coated nylon. They tend to be pretty light and pack down small. The downsides are poor breathability and durability.
bivvy bag
The Highlander Hawk bivvy bag is lightweight, breathable and waterproof.

What are the disadvantages of a bivvy bag?

  • If it rains, you’ll have a less pleasant night than if you were in a tent or five-star hotel.
  • Even the best bivvy bags leave some condensation on your sleeping bag. For a single-night trip this is no problem, but for extended use you need to be able to hang your sleeping bag up to dry occasionally.

How do I use a bivvy bag?

  • Just slip it over your sleeping bag. Do it before leaving home rather than doing it later in the dark and pouring rain.
  • Pull it up over your head when you sleep. Just leave a small gap for breathing to minimise condensation.
  • Experiment with having your sleeping mat under OR in the bivvy. See what works best for you.
  • Remember to take a large waterproof bag to put your other stuff into at night. You can use this as your pillow.

How do I make it comfortable?

  • A tarp will give you rain protection. See our tarp article here.
  • You’ll probably want a lightweight mat. Cheap foam ones are good, but – if you have the space – more expensive self-inflating mats are better (see our article here). You can, if you must, use bubblewrap. Our top choice if you’re not carrying your kit very far is the  Sea to Summit Comfort Plus. For a smaller, lighter alternative, we rate the Thermarest Neoair Camper SV.Nilaqua waterless wash
  • Your choice of sleeping bag depends entirely on the situation. If you are going lightweight, then choose an (expensive) tiny down sleeping bag. Also have a look at our review of three-season sleeping bags. Taking warm clothes or a down jacket and just a silk liner is another option.
  • Water wipes wetTake Nilaqua waterless washes – there are body and hair washes that will keep you clean without access to a shower or running water (not for very sensitive skins). Waterwipes are excellent and completely pure.

There are lots of options, but our one recommendation would be….just get out there and give it a go! Meanwhile, do share your own kit tips and bivvying stories with us – there’s a comment option below. Has anyone tried those covered camping beds, for instance?

Wednesday, 28 March 2018

A BEGINNER’S GUIDE TO LIGHTWEIGHT CAMPING


Free stock photo of dawn, landscape, nature, sky

When you go camping or backpacking, it can be all too easy to take everything but the kitchen sink. However, this can very easily lead to overflowing rucksacks, aching backs and shoulders (and even injury), and generally a rather uncomfortable time of it.
If that sounds familiar, or you’d like to avoid any of that from the outset, then it might be worth considering lightweight camping.

What is lightweight camping?

On a very basic level, lightweight camping is pretty straightforward – just stripping out all the gear that isn’t essential, and choosing products that are more compact and weigh less than you’d perhaps normally take with you.
We can start to get really technical looking at pack weight, and really strip everything back if we want to talk about ultralight camping or backpacking. For instance, lightweight base pack weight is often defined as under 10kg, and ultralight as under 5kg.
However, we’re not going to go that far. For the purposes of this guide, we’re going to keep it relatively simple and assume you’re someone who just wants to reduce the weight of the gear you’re carrying.
Those taking part in the Duke of Edinburgh’s Award, for instance, will want to keep their pack size down to a minimum, as might families who are fed up taking half their house with them when they go away.

Lightweight Camping Gear List

Obviously you should leave behind non-essentials, but what should you take with you? We’ve put together a lightweight camping gear list, with some helpful advice on what to look for when buying your camping equipment.

Lightweight camping tent

Your tent is probably going to be the heaviest piece of equipment you take with you, so it’s important to try and be as economical with space as you can. A one-person tent is ideal for the warmer months, although in winter you might want to consider a two-person tent to accommodate extra kit.
Wild Country & Terra Nova make excellent lightweight tents, but most brands have suitable selections. Take a look at all our lightweight tents for camping or backpacking, or check out our one-man tent buying guide.
Wild Country lightweight 1 person tent

Lightweight sleeping bag

Getting a good night’s sleep is important, and going lightweight doesn’t mean you have to forego getting some decent shut eye. Mummy sleeping bags are a good choice, as they tend to be warmer, lighter and have a smaller pack size.
Then it’s a choice between down and synthetic filling. Down is lighter, packs smaller, and has incredible warmth-to-weight ratio – although it is more expensive, and damp/wet conditions can affect the performance of the bag. Synthetic is cheaper but generally heavier and bulkier.
Opt for a 1-2 season sleeping bag in nice weather to cut down on the bulk. You could use a 1-2 season bag even in colder weather, and just put more layers of clothing on or use a sleeping bag liner, but we’d always recommend having a sleeping bag that provides the appropriate level of warmth.
Shop all of our sleeping bags.

Lightweight sleeping mat

A good quality sleeping mat is also a key part of getting a good night’s sleep, so it’s worth getting a good one. Granted, you could opt not to take a mat if you really want to cut down on bulk, but we’d always recommend taking one.
¾ length self-inflating mats are a great option, as they’re nice and comfy and also pack pretty small. For winter, even if you’re trying to go lightweight, we’d still advise taking a full-length sleeping mat, as they’ll help reflect the heat back up to your body and reduce cold spots coming through the cold ground.
Shop all of our sleeping mats.

Lightweight stoves & cookware

If you’re going to be doing a spot of cooking, then you’re going to need a lightweight stove and cookware – unless you plan on making a fire, of course.
Jetboils are excellent at what they do, boiling water very quickly, but they can be a little bulky. This Vango folding gas stove is a good choice if you just want something simple.
Vango lightweight compact camping stove
Sea to Summit also make some excellent lightweight and space saving cookware, such as collapsable bowls and other handy bits and pieces. If you’re cooking for one, then don’t bother with plates or bowls – just eat straight out of the pan!
Take a look at all of our camping stoves and cookers.

Lightweight rucksacks & backpacks

The time of year and extent of the lightweight camping trip will determine the size of rucksack you’ll need. Around 60L capacity should be fine for most activities – however, in summer you should be able to get away with an even smaller rucksack as you’ll need fewer layers and a thinner sleeping bag, requiring less room in your pack. We’d still recommend taking a dry bag to keep your kit dry and organised.
See all of our rucksacks or have a read of our rucksack buying guide for more information.
We have also produced a guide on how to pack a rucksack to make the most of the space you have available.

Clothing

Are you someone who packs enough clothes for a month away, even though you’re only going for a couple of nights? If so, you’ll have to cut back to only a couple of outfits.
Try layering thin clothing rather than bringing big, bulky items – baselayers are ideal for this, helping to keep you warm while taking up very little room. Garments made from merino wool are also good as it’s quite lightweight and dries quickly if it gets wet.
In terms of footwear, ditch the walking boots and try walking shoes or trail shoes instead. They’re much more lightweight and should be perfectly suitable for most short to mid-length walks.
Wayfayrer camping food

Food

Dried and dehydrated food is ideal. It won’t spoil as easily, but it also packs much smaller than regular food. You can have whole meals without having to take all the ingredients separately – and don’t worry, they’re very tasty and nutritionally balanced!
We stock Wayfayrer and Adventure Food camping meals, both of which have a wide range of choices available.
Have a look at all our camping food.

Water

Water is absolutely essential to your wellbeing when camping or backpacking, so always make sure you have access to some, one way or another. You’ll need it for drinking and for cooking if you’re using dried food, so always ensure you have enough.
Use a collapsible water container, so when it’s empty, it’s much easier to store. Don’t bother with metal bottles; they’re far too heavy. You can also buy hydration bladders that will fit inside most rucksacks if you have space.
You may have access to natural fresh water while you’re away, such as a tarn, and if you want to get your water from there, make sure you have water purification tablets with you (it’s good to have some of these with you anyway). However, to be on the safe side, try and stick to running water if possible.

Bonus tips for lightweight camping

As well as the advice above, here are some handy camping hacks that will help you cut down on how much gear you take with you.
  • Cut down the length of your toothbrush.
  • Use a cheap foil emergency blanket under your sleeping mat for extra insulation.
  • If you’re taking a map, cut out and take with you only the bit you need.
  • Toilet paper – remove the cardboard centre, so it packs flat, and put it in a plastic bag.
  • Cut up a straw. Fill the pieces with toothpaste for one-use packets. Seal the ends. with a lighter – be careful!
  • Check the weather – by knowing what the weather’s going to do, you can plan ahead and leave unnecessary gear at home.
  • Use a head torch rather than carrying a bulky torch in your back. This also frees up your hands.
  • Make a small first aid kit – put plasters, a few pills, antiseptic wipes, and whatever else will fit into a pill bottle.
  • Dry out your gear – if it gets wet, then it’s going to weigh a lot more than if it’s dry.
  • Use a hydration bladder rather than bottles of water. Some rucksacks come with space specifically for them.
  • One of these Sea To Summit Sporks will give you a full set of cutlery.
  • Use nearby rocks as tent pegs.
  • Try a microfibre instead of a beach towel – lightweight, quick-drying and dirt-resilient.
  • Use your pack instead of a pillow.
One last and very important tip is to never take any unnecessary risks when lightweight camping. Always make sure you have enough stuff with you to stay warm, fed and hydrated. You might want to cut down on weight, but you need to make sure you stay safe.

Wild Camping Tips and Kit List

The first rule of Wild Camping club is...  actually really simple! Leave No Trace: if you take it in, you carry it out. What is wild camp...