Showing posts with label camp cooking. Show all posts

Saturday, 1 September 2018

Tent Camping: Food and Meals

Tent Camping: Food and Meals

Camp Kitchen

We found the wooden gangplank or whatever it is resting on a pile of rocks. It made a great kitchen counter!
We found the wooden gangplank or whatever it is resting on a pile of rocks. It made a great kitchen counter! | Source

All About Camp Cooking

While the lack of refrigeration may put a damper on your style; space and storage are the main concern regarding camp supplies. But if you plan ahead and get a little creative, camp meals can be fun, nutritious and delicious.
Camp cooking may pale before your usual home-cooked gourmet feasts or favorite frozen food entrees but don’t worry – fresh air really whets an appetite. Everything tastes great!
Make sure you pack essential equipment, foods, storage containers and food preparation necessities. The last thing you want to do when you're camping is have to run out to the store. Of course many of the best camp sites are way too far from any store to make a grocery run even thinkable. If you do forget something, learn to make-do. That's all part of the camping experience.
Kitchen set-up is important too. A well-laid out kitchen makes cooking convenient, safe and fun.
The first thing is to build your kitchen with a large tarp, rope, branches or poles in case of rain. This sheltered area should be out of the wind and well away from the tents. If you have a campfire, the actual kitchen area should be set away from this for safety.

Remember never take food into your tent. Food attracts pests to your tent – insects, rodents and bears.

Food Shelter - It Doesn't Have to be Pretty

Keep food area away from tents and provide shelter from the elements
Keep food area away from tents and provide shelter from the elements | Source

Kitchen essentials


  • Water – 2.5 to 5-gallon containers. You need 2 – 4 quarts of water per day per person. And that’s only to drink. Don’t forget water will be needed for cooking and clean up.
  • Stove and fuel (and waterproof matches)
  • Tarp, ropes, clothesline, etc.
  • Table or something to use as a table if you want to rough it.
  • Seating – camp stools, camp chairs, logs, large rocks, etc.
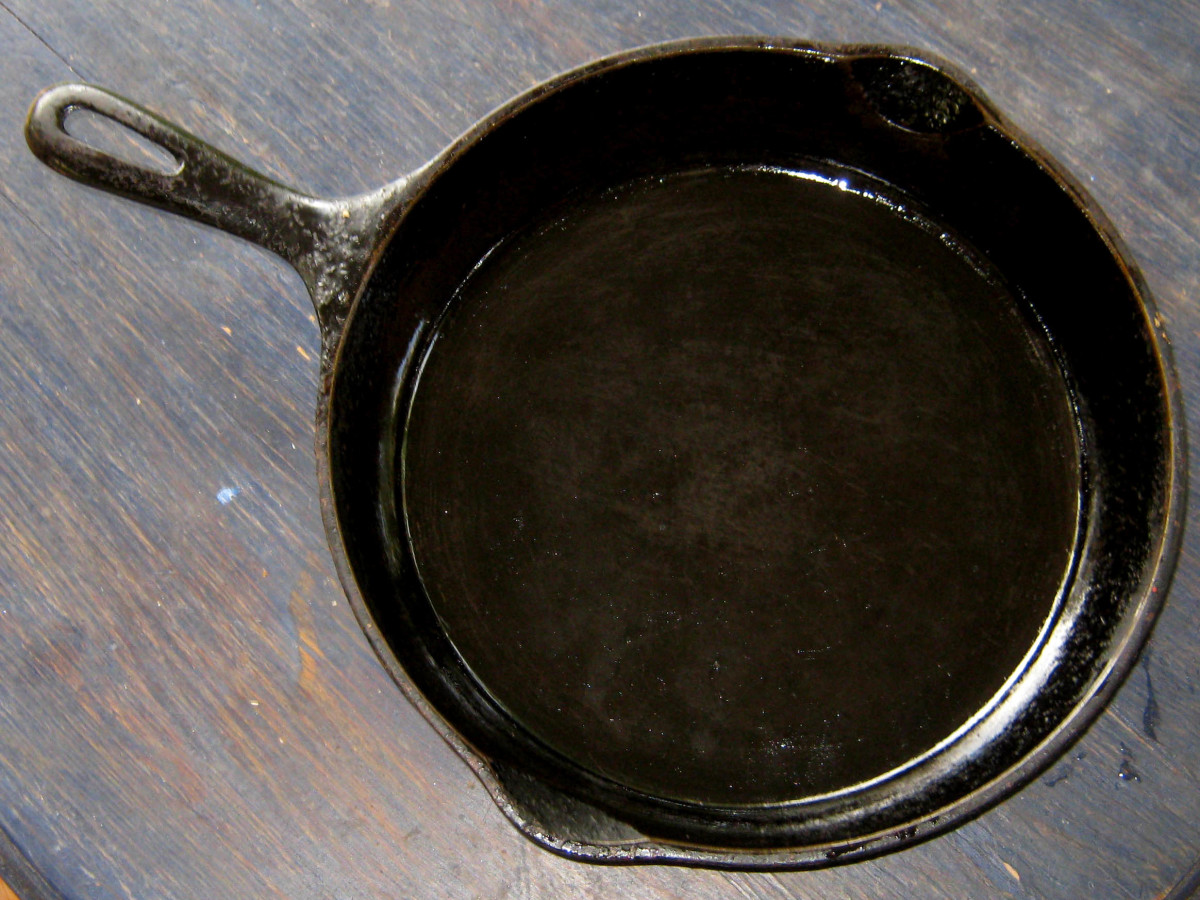
  • Frying pan and Dutch oven – cast iron is best but heavy. You can transport stuff in the Dutch oven.
  • Coffee pot – can be used to heat water for tea, soup, pasta, coffee, hot chocolate or for doing dishes
  • Plastic bowl or tub – for washing up and storage
  • Rags, old towels, scrubbies and biodegradable soap
  • Eating utensils – knives, forks and spoons
  • Cooking utensils – sharp knife, can-opener, large spoon, spatula
  • Cutting board – wood or plastic
  • Cooler – good for up to 2 days if most of the food is frozen
  • Plastic tubs with tight fitting lids (or bear proof container)
  • Zip lock bags for food storage.
  • Aluminum foil (wrap foods up and cook)

Cast Iron Pan

Source
Some things never change.
Some things never change. | Source

Food To Take on a Camping Trip


  • Premade meals – dried, dehydrated, freeze dried (this stuff can be expensive, be creative and make your own meal ahead of time yourself)
  • Tea, coffee, hot chocolate, dry juice mixes
  • Hard cheese does not need refrigeration (I don't care what they say)
  • Cereals – granola, cream of wheat, oatmeal, muesli
  • Fruit – fresh and dried
  • Nuts – great in meals or for snacking
  • Sunflower Seeds – great in meals or trail mixes
  • Breads – flat breads and hard crackers (regular bread gets squashed)
  • Soups – instant Knorr, Ramen or bullion to make your own
  • Lentils – quick cook, dried or canned beans
  • Pasta – thinner cooks faster
  • Dried veggies
  • Honey, sugar
  • Peanut butter
  • Flavoring agents – soy sauce, hot sauce, salt, pepper, garlic, dried onion, cilantro, cinnamon etc.
  • Canned meats – or dried
  • Alfalfa or dry beans for sprouting (in a zip lock bag with damp paper towel).
  • Chocolate, marshmallows, graham crackers! (For S'mores)
  • Potatoes - you cam almost make a meal out of a baked potato (with cheese), or chop and fry up potatoes with eggs, onions, almost anything. A versatile, not squashable food. 

Cooking over a camp fire

You opted out of youtube

Great Camp Meals


The first and possibly second night out, you can enjoy ‘fresh’ food from your cooler.
  • Chicken breasts or cubed chicken cooks up real quick and can be added to rice or pasta. Or you can cook them at home to be eaten cold, or rewarmed.
  • Foil pack dinner – ¼ pound of ground beef per person, chopped onions, carrots, celery, garlic and cubed potatoes with a splash of soy sauce. Close tightly and set on coals or on stovetop and cook for 30 minutes or so.
  • Hot dogs and beans are great All-American camp foods.
After the ice has run out, dinners can still be delicious :
  • Macaroni and cheese (packaged or camp-made) 
  • Canned chili 
  • Canned stews 
  • Pasta and dried veggies 
  • Grilled cheese and soup 
  • A Delicious Beans and rice dish: Cook rice. In pan sauté garlic and chopped onions. Add canned black beans and canned chopped tomatoes. Heat up and add cilantro, pinch of salt and lime juice. Serve bean mix on rice with shredded sharp cheese.
  • Fresh fish! You can enjoy fresh food anytime if you’re lucky enough to land a legal sized one. Clean the fish well away from campsite and bury the guts (to deter bears). Never wear your fish cleaning clothes in the tent. Cook and serve the fish as soon as possible for maybe the best meal you have ever eaten!

Deter those pesky bears


Personally, I would never camp in a state that contains grizzly bears. No offense to the folks (or bears) who inhabit those beautiful places. Maybe I’ve watched too many movies. Maybe I’m just a big baby. But if you are new at camping, you need to be careful and remember that it’s the bear’s home, not yours. You are the intruder and sometimes certain bears are not too happy with that.

Now, black bears, though appearing to be large, cuddly creatures can be dangerous as well as messy. Nothing a black bear likes more than to raid a campsite, eat up all the brownies and cookies and throw everything else all over the place.

  • Avoid areas frequented by bears.
  • Use a bear vault - a strong bear proof container that can be purchased. Some camp sites provide bear vaults.
  • Try to spot the bear before he spots you; avoid him by backing quietly away.
  • Hoist your food container into a tree 4’ away from the trunk and 10 ‘ above the ground if there are bears in the area.
  • Bang pots and make some noise if you think a bear is poking around. Supposedly, they don’t like a lot of racket. However, some folks think the banging of pots is like the bear’s dinner bell


Source: https://skyaboveus.com/camping/Tent-Camping---Food-and-Meals

Sunday, 12 August 2018

Ten of the best camping Dutch oven recipes

Dutch oven recipes
Campers are welcome to hire Dutch ovens for use at our woodland campsites

Dutch oven recipes

Dutch ovens are cast iron cooking pots and offer a great way to make a campfire dinner as an alternative to a barbecue during a camping trip. During the last few months as a warden at our Wild Boar Wood Campsite I have been learning and researching recipes to make the most of the Dutch ovens and am amazed at what you can make in them. Here’s my pick of Dutch oven recipes…
Dutch oven recipes
Dutch oven bread
Yes – you can make a loaf of bread on a campfire! You just need a Dutch oven to do it. Make a simple bread dough with flour, water, sugar, salt, and a little oil. Raise a foil tray off the base of the Dutch oven by placing it on top of some stones and then place your dough on your make-shift baking tray. Put the lid on your Dutch oven and place it on over some charcoal or embers – then put twice as many on top of the lid as below. You will need to replace the charcoal or embers every 10-15 minutes to keep the temperature up. I used the Dutch Oven Dude websitefor advice on baking for my first loaf and it turned out a treat.
2. Chilli.
Hot, filling, hearty and wholesome: there’s nothing like a campfire chilli and it can be as simple or as involved as you like. Use your own tried and tested recipe but let the flavours develop in the Dutch oven or try Jamie Oliver’s cowboy-style speciality.
3. Mountain man breakfast.
One of our campers suggested this hearty breakfast recipe – can’t wait to try it out!
Dutch oven recipes
Dutch oven pizza
We’ve learned that you can cook anything in a Dutch oven – including delicious pizza! The one pictured above was made by one of our campers who brought homemade dough to the site and baked her pizza with our help. Just follow the instructions for baking bread but shape it and size it as a pizza base and bake for 20 minutes before adding toppings and cooking for a further 20 minutes.
5. Cassoulet.
Beans and sausages are classic cowboy grub, perfect for cooking in the Dutch oven and guaranteed to fill the stomachs of hungry campers.
Dutch oven recipes
Blackberry upside-down cake
If you’re cooking outside – why not make the most of nature’s bounty and use some foraged food in your cooking? Try this blackberry upside-down cake for starters – number two in our list of blackberry recipes.
7. Bacon spuds.
The ingredients list does not extend far past the title but with campfire food sometimes simplicity is best. Dutch oven dude’s way with words when describing campfire cooking practices has also tickled our fancy.
8. Chapattis.
One of the great things about Dutch ovens is that you can use the lid of the cooking pot as a separate pan. We use the lid to cook chapattis on sometimes – turning it upside down on a grill over the fire. At the same time you can use the main dish to cook a curry or stew to eat with the flat breads.
9. Cinnamon rolls.
If you have a sweet tooth, this all American recipe is too tempting not to try.
10. Beef stew with dumplings.
An all-in-one stew cooked in the Dutch oven is a great campfire dinner. Try the recipe above but instead of serving with mashed potatoes add a couple of potatoes to the stew itself with a little extra water to make a one-pot-meal.

Friday, 6 July 2018

Dutch Ovens: 5 steps to better camp cooking

Dutch Oven
The Dutch Oven will transform your camping experience.  If you are outside with the family, you all will be burning calories, even more so if it’s cool. Living off burnt sausages and burgers for more than a day is not the answer.   With a Dutch Oven you can get a good warm meal with all the nutrients to refuel the family, preventing some of those “tired and irritable” moments.

1. Dutch Oven: What is it?

A Dutch Oven is a large cast-iron pot.  Simple.  But, like most simple things, it is really effective.
It is very easy to cook with, and as you can get heat to the food from above and below, it works as an oven, enabling you to stew, boil, fry, bake and roast.
Watch our video that explains how it works:

2. Seasoning your Dutch Oven

Before starting out with your dutch oven you need to season it.   This is puts a non-stick coating around your oven, protecting the metal from rust, and making it easier to clean up when on camp.
  • If new, clean your dutch oven (the only time you do this with water and detergent), and dry it – you don’t want water getting to the cast iron.
  • Smear a thin layer of unflavoured vegetable fat all over.  Inside, outside, lid, legs, handle – everywhere.
  • Put it on your BBQ.  You need to cook the fat into the iron to give it the non-stick coating.
    You can do this in your oven, but this process smells, so I recommend you do this outside.
  • Repeat at least twice to ensure all the oven was covered.  Do it more if you can as that will give the oven greater protection and it will be easier to clean on site.
You may need to repeat this process (except the first step) at the start of each season.

3. Cooking

Cook with charcoal briquettes.  These give a lot more control over the temperature as they are a uniform size (unlike lump wood), and give a relatively consistent heat (compared to a fire).
You don’t necessarily need many, for example, five below and a few on top may be enough for a stew.   The more you add the hotter the oven.
You will need to get a supply of briquettes to replace those that burn out.  You can place new briquettes next to ones that are still hot, or alternatively, get some started by placing them around the edge of the fire.
To start the initial batch of briquettes off you can use a briquette starter.
We typically use our Dutch Oven with our tripod (click here to see our tripod setup).
Follow this guide to position the briquettes for different types of cooking:
  • Baking: More heat from top so bottom doesn’t burn.
    3/4 coals on top; 1/4 underneath.
  • Roasting: Heat comes from both top and bottom.
    1/2 coals on top; 1/2 coals underneath.
  • Stewing and simmering: Most heat from bottom.
    1/4 coals on top; 3/4 coals underneath.
  • Frying and boiling: All the coals underneath.
To avoid heat spots, which can cause food to burn, rotate the oven about every 10 minutes.   Twist the oven about 1/3 of the way around (lift it, twist it, and place a leg where the previous leg had been).  If you have coals on top, twist the lid in the opposite direction.
I also recommend you get some Hot Gloves, a pastry brush for sweeping ash away from the lid before you open it, and a Lid Lifter or suitable hook to lift the lid off without touching it (and it also keeps the coals balanced on there without them falling off!).   You should also find something to place the lid down on so it remains upright but not get covered in mud or grass.  We use the griddle from our portable BBQ, since that is not in use when we have the oven on it.
Our Dutch Oven plus BBQ set up

4. Cleaning

After serving up the meal, start the cleaning process.  This sounds a lot of work but it really isn’t.
  • Remove all food.  Any burnt on food gently scrape away with a wooden spoon.  Do not use a metal spoon as that will remove the seasoning.
  • With the oven cool, add a few inches of water.
    Never add cold water to a hot oven as it will crack the metal.
    I recommend leaving your oven to cool and warm some water in the kettle (doesn’t need to be boiling).
  • Place the lid back on the oven and warm it up.   Since the oven is seasoned, this process will pull the food way from the oven’s sides.
  • Try and get the above going before you eat (it only takes a moment)… then enjoy your food.
  • Once full (you, not the oven), remove from heat and let cool.  Then discard the dirty water and rinse out with warm water.   The oven should be clean.  If not, repeat.
  • Dry the oven, then place on a low heat, over the fire, or next to the fire, with the lid slightly off.  This will remove any remaining moisture within the pores of the iron.
  • Finally, before packing it away, use a paper towel and smear unflavoured vegetable oil over the oven to give it a bit more protection.  Wipe off any excess.
Never use soap.  Detergent will remove your seasoning.

5. Get one

As with most things, you can get Dutch Ovens and related equipment from Amazon.
You can get Dutch Ovens in a number of different sizes (and you can stack them on top of one another too if you need to cook more things with the same set of coals).

Dutch Oven Camp Recipe Favorites

Try these Dutch Oven favourites.
Cooking should be relaxed and simple.  Chop an onion, thrown in some spuds, add a tin of beans, and have a beer…
Obviously safety around hot things and campfires must be understood by kids, but helping cook in a dutch oven is something they will enjoy.

Cowboy Stew

A favorite of “Stinky Pete” I guess. You don’t have to stick to the recipe exactly for it to work.
Follow our step-by-step guide to this really simple recipe.

Breakfast

When waking up on a cold damp morning, getting the fire going and a warm breakfast is just what’s needed – something you can’t do if you are mainly camping off BBQs.
  • 1lb Sausages (Quorn ones work well as well)
  • Frozen Hash Browns
  • 12 Eggs (yes, a lot)
  • 1/2 lb Cheddar Cheese
  • Salt and Pepper
Grate cheese.
Preheat Dutch Oven with coals underneath.
Cut or tear sausages into little pieces and put in oven.  Stir until sausage is cooked (or just heated through if using precooked sausages).
Add the hash browns.  Stir and fry until hash browns are browned.
Remove from coals.  Mix eggs and pour over the top of the sausage and potato base.  Season with salt and pepper.
Cover Dutch Oven and add coals to the lid to cook the eggs from above.
When eggs are cooked, sprinkle cheese, cover and cook for 5 minutes to melt the cheese.

Pizza Casserole

This is a creative meal.
  • 2 packs of rolls
  • Cheddar Cheese
  • Mozzarella Cheese
  • Jar of pizza sauce
  • Mince
Grate the cheese (or slice mozzarella).
Brown the mince in Dutch Oven then remove.  Let the oven cool.
Line the bottom of the oven with 1 pack of rolls – can use sliced bread if rolls are not available.
Spread pizza sauce over rolls.  Add mince.  Add cheese.  Add the remaining pack of rolls to the top.  Bake (i.e. most of the coals on top) for 30-40 minutes.

Tuesday, 19 June 2018

10 Delicious ‘Real food’ Backpacking Recipes

10 Delicious 'Real Food' Backpacking Recipes - From 'Wild About Scotland'
Camp cooking
.
I’m willing to bet that the vast majority of us put little effort into thinking about food when we go backpacking and wild camping.  High on our list of priorities are the route, the gear we’re taking and the logistics of getting from A to B.  Food comes way down the list and tends to grabbed during a supermarket trolley dash for packets of easy-cook meals that simply fulfill a functional need for calories.
A quick scour of the hillwalking forums suggests that most people take this ‘convenience’ food route.  Either they buy expensive ready-made main meals from the likes of Wayfarer or Mountain House or go for bog-standard packet food such macaroni cheese or fried rice.  It’s tasteless, bland stuff that barely fills the stomach of an active hillwalker.
But why should we put up with eating dross just because we’re camping out in a tent ?  It’s not that we don’t know what good food tastes like: it’s simply a failure of imagination.
What about weight, I hear you say ?  Tinned food, sauces and other ingredients weigh much more than a freeze-dried packet.  However, this needn’t be the case, particularly if you’re eating lightweight, high-calorie staples such as couscous and pasta and adding some really flavoursome ingredients to spice things up.  Anyway, isn’t a little extra weight worth it to give a healthy, satisfying meal rather than serve a functional need ?
I’ve been on a quest to find some ‘real food’ backpacking recipes.  I’ve chosen ten main course meals that are guaranteed to give a boost at the end of a long day’s hilllwalking.  I’d be keen to hear any other suggestions you may have.
All of my recipes can be easily made when out in the great outdoors, carried in a rucsac.  No need to buy a home dehydrator and then reconstitute meals with water a couple of hours before meal time.  No need to source those hard-go-buy ingredients often included in common US recipes (beef jerky anyone ?!).  And no need to build a campfire, BBQ pit or any of the other complications that many car-camping or glamping sites will recommend.  No, these recipes are just simple, tasty and filling.
But why should we put up with eating dross just because we’re camping out in a tent ?  It’s not that we don’t know what good food tastes like: it’s simply a failure of imagination.
The best backpacking recipes are quick, high in calories and lightweight.  They also need to have bags of flavour.  Having got bored of bland packets I want a meal that I can look forward to, not something I’m going to dread after the second night.  So many of these recipes rely on ingredients with strong flavours such as chorizo, anchovies, chilli flakes and sundried tomato paste.
All recipes are for one person but quantities can of course be varied according to appetite and taste.  It’s a good idea to test out the meals at home first if they’re not something you’re familiar with cooking.  I’ve tried to avoid using tins wherever possible since they’re difficult to carry out from the hill, but would suggest that the contents of a tin be transferred to plastic containers or zip-lock bags.  Substitute tinned tomatoes for passata in a soft tetrapack that can be squashed down after use.  Another tip is to pre-prepare vegetables and mix these in olive oil at home; when you’ve pitched up, all you need to do is empty out the contents of your sealed zip-lock bag.  All of the recipes can be cooked in one pot but most do require the first cooked set of ingredients to be set aside then added later – so make sure you have a plate or container handy.
Anyone getting hungry yet ?  Here are the recipes.
.

Chorizo and parmesan pasta

The chorizo really gives bags of flavour to this simple, tasty meal.  The ingredients will last a few days out of the fridge and don’t require any pre-preparation at home.
Ingredients:
  • Packet of passata (or tin of tomatoes)
  • Chorizo sausage (sliced)
  • 1⁄2 a courgette
  • 1 clove garlic
  • Grated parmesan cheese
Directions:
  1. Fry the sliced chorizo in its own oil (which should come out after a few minutes) until it becomes crispy. Meanwhile, slice the courgette and a garlic clove and fry these for 5 minutes before adding a packet of passata and heating through.
  2. Cook your pasta, then drain and mix with the sauce. You could add some grated parmesan if you have a knife or other ingenious implement.
.

Pea & Mint Risotto 

Guaranteed to provide a tasty, filling meal with the fresh mint and parmesan really enhancing the taste.  It’s important to avoid burning the risotto – keep stirring ! – particularly if you’re using a lightweight titanium pot which doesn’t transfer heat as well as an aluminium one.
Ingredients:
  • Risotto rice
  • One onion, finely chopped
  • Chicken or vegetable stock
  • Olive oil
  • Peas
  • Freshly chopped mint
  • Grated parmesan cheese
Directions:
  1. At home, finely chop the onion and store in a zip-lock back with a tablespoon of olive oil.  Store some frozen peas, grated parmesan and a few fresh mint leaves in a small plastic container.
  2. At your campsite, boil enough water to cook your risotto, dilute the stock pot and set aside
  3. Fry the onions in their oil on a low heat for 5-6 minutes until soft but don’t let them brown
  4. Add the risotto rice and cook, stirring continuously until it becomes translucent and softer
  5. Add the stock, a little at a time, until the rice absorbs the liquid.  (Make sure the rice doesn’t dry out).  After about 15 minutes the rice should be almost ready – taste to check.
  6. Add your pre-cooked peas for a minute or two to warm through, then melt in the parmesan and finally add the fresh mint.

  7. On this occasion, cooked in a campervan – with green beans added

Pasta Puttanesca

A favourite of ours at home and easily transferred to the great outdoors.
Ingredients:
  • Pasta
  • Black olives
  • 2 garlic cloves
  • Teaspoon of capers
  • Dried chilli flakes
  • Packet of passata
  • Tin of tuna (sealed in a plastic container)
Directions:
  1. At home, put some black olives, two cloves of garlic, a teaspoon of capers and dried chilli flakes to taste into a small freezer bag.
  2. At your campsite, mix the contents of the freezer bag with a packet of passata then add the drained contents of a tin of tuna and simmer for 10-15 minutes.
  3. Put to one side and keep warm while you boil your pasta.  Mix then eat !
.
DSC_0053mod2
.

Sicilian sardine spaghetti

A simplified recipe using tinned sardines in tomato sauce rather than fresh sardines – but with loads of flavour.
Ingredients:
  • Spaghetti (or pasta)
  • 120g tin (or 2 if you’re hungry) of sardines in tomato sauce
  • Fennel seeds
  • Dried chilli flakes
Directions:
  1. Cook your spaghetti (or pasta if you prefer)
  2. Add one 120g tin of sardines in tomato sauce.  Hungry hikers may want to use two tins.
  3. Add fennel seeds and chilli flakes to taste then enjoy.  [Note: sardines are very smelly so make sure you take away your waste in a sealed container !].

Copy (1) of DSC_0018_2

Fragrant Thai broth

For something a bit different, this recipe packs a big punch.  Using fresh spices will really ‘lift’ the taste.  I advise taking small quantities of dried chilli flakes, fish sauce and lime juice ready mixed from home – you might want to pre-cook the ingredients at step 3 in advance just for 5 minutes and take in a plastic container.  It’s a good idea to try this recipe at home first to get the right proportions of your sweet, salty, spicy and sour ingredients.
Ingredients:
  • 1 stick of lemon grass (fresh if you can get it)
  • A thumb-sized piece of root ginger
  • 2 kaffir lime leaves
  • 1 Knorr chicken stock pot
  • Sachet of sugar
  • Tablespoon of fish sauce
  • Dried chilli flakes
  • Tablespoon of lime juice
  • Half a red pepper
  • Half a courgette
  • Green beans
  • Fine or medium egg noodles
Directions:
  1. Using a handy stone, bash together a stick of lemon grass, a thumb-sized piece of ginger and 2 kaffir lime leaves.
  2. Place in your pot with one chicken stock pot and the desired amount of water for your broth.
  3. While simmering, add a sugar sachet, dried chilli flakes, a tablespoon full of fish sauce and a similar amount of lime juice (these could be mixed at home and taken in a small plastic container).  What you’re trying to achieve is a flavour which is simultaneously sweet, salty and sour.
  4. After 10 minutes simmering to let the flavours out,  add your chosen vegetables – I suggest a mix of finely sliced red pepper, courgette or green beans.
  5. Finally, add some fine or medium egg noodles to cook for the last 3-4 minutes before eating.
.

Black Bean Chilli

A filling bean and vegetable curry.  This recipe requires a little preparation at home and ideally needs two pots for the cooking process.
Ingredients:
  • olive oil
  • 1 small onion, chopped
  • 1 garlic clove
  • 1 carrot, chopped
  • 1 pepper, chopped
  • 1/2 teaspoon each of chilli flakes, cumin and oregano
  • 1 Knorr chicken stock pot
  • 1 Knorr vegetable stock pot
  • 1 packet of passata
  • 1 tin of black beans
  • salt and pepper to taste
Directions:
  1. At home: Chop the onion, carrot, pepper and a garlic clove, and store these in a zip-lock bag with a tablespoon of olive oil. Keep the seasoning in a separate bag too.
  2. At your campsite: Fry the vegetables in their oil until the onions have softened, about 5 minutes.
  3. Add the seasoning, passata, vegetable stock and black beans, and cover and simmer until the carrots are tender (perhaps 15 minutes).  If you have a pot cosy (and two pots), keep this pot hot while you go to the next step
  4. If you have a separate pot with a lid, boil a little water and add one Knorr chicken stock pot. Measure out some couscous into a bowl with a lid and just cover the couscous with the water.  Put the lid on for 5 minutes until the stock has been absorbed.
  5. Add the black bean chilli to your couscous and eat while hot.
.
DSC_0056mod
.

Sausage gnocchi with fine green beans

This is a good recipe for your first evening meal since it contains sausages, which should be fine if taken from a fridge that morning.  One packet of gnocchi will serve 2 or even 3 hungry hikers to it’s advisable to take only part of the packet, depending on your appetite and size of your pot.  The combination of the sausages and fresh herbs, pre-prepared at home, give a great taste.
Ingredients:
  • 1 packet of dried gnocchi (or part of a packet)
  • 4 spicy thick sausages (good quality)
  • 2 teaspoons fennel seeds
  • 2 sprigs of fresh rosemary
  • 1 packet of passata
  • fine green beans
  • 2 tablespoons of olive oil
  • 1 tablespoon of maple syrup or honey
Directions:
  1. At home, store the olive oil, maple syrup (or honey), fennel seeds and fresh rosemary into a sealed zip-lock bag or small plastic container.
  2. At your campsite, squeeze the sausage meat out of the skins into your pot (discard the sausage skins).  Break the meat apart, add the contents of your zip-lock bag or container and cook, stirring regularly until until the sausages are golden brown.  Remove from the heat and set aside.
  3. Boil some water and then add the dried gnocchi and cook until they rise to the surface.  Also add the fine green beans on top of the gnocchi – they should both take about the same amount of time to cook, roughly 3-4 minutes.
  4. Drain the gnocchi but remove the beans separately and set aside.
  5. Add your sausage mixture to the gnocchi then add the passata and heat through until piping hot. Add your beans on the side and enjoy !


On this occasion, cooked in a campervan


Stir fry rice

This is another meal for your first day’s walking if you’re planning on including bacon lardons; otherwise omit the bacon and the ingredients will last several days.  It’s a little cheeky to include a packet of egg-fried rice in this recipe but it does provide the most convenient solution out in the wilds.
Ingredients:
  • 1 onion, chopped
  • packet of bacon lardons
  • mushrooms, chopped
  • olive oil
  • packet of egg fried rice (or alternative flavour)
  • sachet of hoi sin sauce
  • fine green beans
Directions:
  1. At home, chop up an onion and some mushrooms and store in a zip-lock bag or small plastic container together with a tablespoon of olive oil
  2. At your campsite, fry the onion, mushrooms and bacon lardons in the olive oil then set aside
  3. Cook the packet rice in water following the instructions, then add the beans for the last few minutes until cooked.  Put the beans to one side and keep warm.
  4. Mix the rice and fried ingredients and add the hoi sin sauce, stirring until piping hot.
  5. Serve with the beans on the side.
.

Haggis and tatties:

With apologies for anyone outwith Scotland, who will struggle to find haggis in their local supermarket, this is real Scottish convenience food !  A haggis should keep out of the fridge for a day or two.  Why not go the whole hog and catch a haggis while out in the hills ?  I’m told they’re much tastier fresh rather than pre-cooked and packed ðŸ™‚
Ingredients:
  • 1 small MacSweens haggis (not too large since it will require too much cooking !)
  • 1 packet of instant mashed potatoes (smash)
Directions:
  1. At home, wrap the haggis in tin foil (still inside its skin)
  2. Boil a pan full of water and then put in the haggis to heat up.  Since the haggis is already pre-cooked you’re really just reheating it.  However, it will need to be simmered for good 20 – 30 minutes.  Make sure you don’t boil it hard since the skin may burst.  If you have a pot cosy, you could simmer the haggis for 10-15 minutes then keep it warm for the remainder of the time.
  3. While the haggis is keeping warm, follow the instructions by adding the required amount of water to the instant mashed potatoes.
  4. Remove the haggis from the pot, scoop it out from its skins and serve with the mash.  Wash down with whisky.
.

Porcini mushroom risotto

Dried porcini mushrooms are incredibly lightweight and a tasty addition to a risotto, but do need rehydrating for 20 minutes before you’re ready to cook.
Ingredients:
  • Packet of dried porcini mushrooms (available from most larger supermarkets)
  • Risotto rice
  • One onion, finely chopped
  • 2 vegetable stock pots
  • Olive oil
  • Grated parmesan cheese
Directions:
  1. At home, finely chop the onion and store in a zip-lock back with a tablespoon of olive oil.  Add grated parmesan to a separate zip-lock bag
  2. At your campsite, first boil a pot of water, add the dried mushrooms then soak for 20 minutes.  Drain the mushrooms, discarding the liquid. Crumble the stock cube into the mushroom liquid, then squeeze the mushrooms gently to remove any liquid. Chop the mushrooms.
  3. Boil another pot of water to cook your risotto, add a vegetable stock put then set aside
  4. Fry the onions in their oil on a low heat for 5-6 minutes until soft but don’t let them brown
  5. Add the mushrooms and fry until they have also softened
  6. Add the risotto rice and cook, stirring continuously until it becomes translucent and softer
  7. Add the stock, a little at a time, until the rice absorbs the liquid.  (Make sure the rice doesn’t dry out).  After about 15 minutes the rice should be almost ready – taste to check.
  8. Melt in the parmesan and serve.

Wild Camping Tips and Kit List

The first rule of Wild Camping club is...  actually really simple! Leave No Trace: if you take it in, you carry it out. What is wild camp...