
Wednesday, 26 September 2018
Tuesday, 25 September 2018
The 5 Types of Campfire and When to Use Them
The 5 Types of Campfire and When to Use Them
There’s a perfect fire for every situation. Learn to pick the right one.

Want to learn more basic backpacking skills? Take our Backpacking 101 online courseand get out on the trail.
Nothing says camping quite like a blazing fire. But which type should you build? It depends on the purpose of the fire and the amount of wood you have on hand. Here’s a rundown of the basic types of campfires and what they’re best used for. (As always, use Leave No Trace principles and check local restrictions before you burn.

Teepee
This classic coned-shape structure is named after the Indigenous dwelling it resembles. A wide, circular base allows for ample oxygen flow, so it burns hot. It’s also easy to feed by leaning more sticks against its upright structure. Because this fire consumes wood rapidly and requires constant maintenance, it’s best used as a quick warming fire or for small cooking tasks, like boiling water (wait for the teepee to collapse, then put the pot of water on the coals and add small sticks around the pot to keep the fire going).
Log Cabin
If you’re looking for a fire with a sustained burn that requires minimal effort, the log cabin is the way to go. By stacking thick logs that fall in on one another as they burn, but still leaving space in the center for air to flow, you create a warm fire that burns much slower than the teepee. Building one is easy: Put two logs in your pit parallel to each other, then stack two more on top perpendicular to them. Continue to stack logs to the desired height, then place kindling in the center square and ignite.
Platform (Upside-Down Pyramid)
The platform fire is in the same family as the log cabin, but its main purpose is to cook food. The difference is that the logs are stacked closer together (think sardines in a can instead of a pound sign), and that the fire is started on the top level of the platform, as opposed to the bottom center like the log cabin. By burning it down from the top, the fire creates a solid, flat “platform” of coals upon which you can place your pots and pans to cook. To build it, lay three (or more) logs on the ground, then place three more on top perpendicular to the ones below, and so on, at least three levels high. Then, start the fire at the top.
Star
The star fire was used by western Native American tribes with low supplies of wood. Unlike the other methods, which burn entire logs all at once, the star method works by aligning the ends of a few logs and burning them bit by bit. The result is a fire that burns slow, requires no cutting (logs can be any length), and creates a full flame. Create a small tepee fire with kindling, then lay four or five logs around it, one end in the fire and the other end leading away like the point of a starburst. As the fire goes, nudge the logs further into the center to replace what has been burned. Another benefit of the star fire is that it can be extinguished quickly by pulling the logs away from the center
Lean-To
When it’s windy, you’ll be happy you know the lean-to method, which uses its own wood as a windbreak. To build the simplest version, lay a thick log on the ground and place your tinder beside it, on the leeward side of the wind. Lean small sticks and other kindling against the log at an angle that goes over top of the tinder. When you light the tinder, it will catch the kindling on fire and begin burning the bigger log. Slowly add larger sticks to build up the fire, and add another full-size log when ready.
Thursday, 20 September 2018
Camping Alone: A Guide to Solo Camping
Camping Alone: A Guide to Solo Camping
Solo camping means camping alone. Many people like engaging in solitary camping because of the unique experience they get from it.
Surprisingly lots of people prefer it to camping with other people. Camping alone can give you peace of mind and self reliance, and it affords you opportunity to reflect on lots of things in your daily life. However if you want to enjoy this type of camping there are some important factors to consider to make the most of your trip and to stay safe.
Solo Camping Checklists
When you want to camp alone, you have to consider a lot of things and the most important among them is safety. When you are camping alone, it means you have to plan for your security, because you are not going to be able to rely on anyone else. You should know there is always the possibility of a mishap and when it happens you may not be able to reach outside help. Here are a list of checks to run through.
Choosing A Camping Shelter
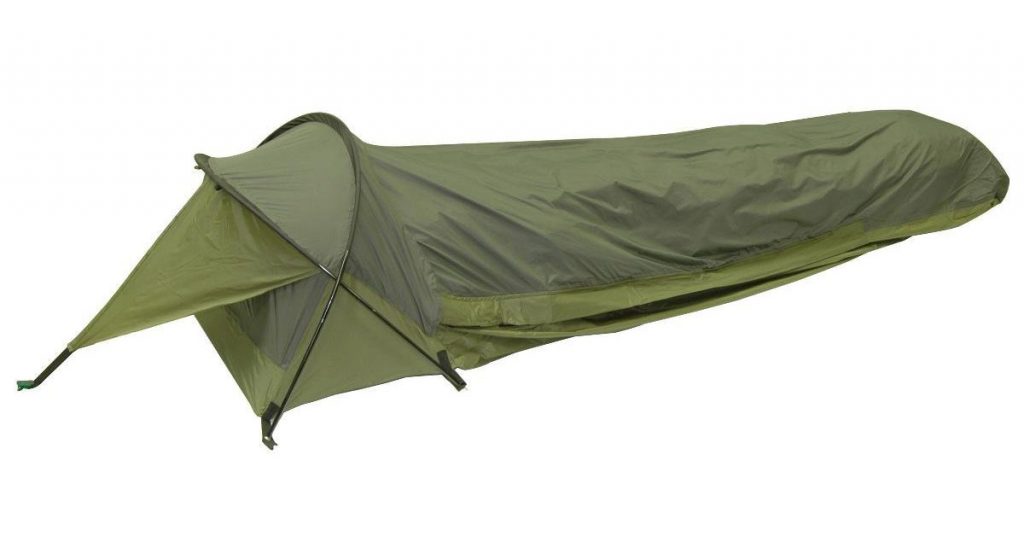
It goes without saying that you’re going to need some kind of shelter to sleep in. Something that sleeps 1 to 2 people is likely to be all you need and if you’re backpacking all that you will want to carry. Consider these 1 person tents or if you have a bit more gear go for a 2 person tent. If you really plan on traveling light you could always opt for a bivy sack, or hammock, perhaps with an additional tarp for waterproofing. Whatever you decide upon go for the best you can afford, buy cheap and you’ll buy twice.
You’ll need to be able to setup on your own
When choosing a shelter remember you’ll need to be able to put it up and pack it away on your own. Something large will give you space to move around in but could be awkward to setup.
Smaller tents offer greater flexibility on placement and will be easier to set up when camping alone.
First Aid Kit
At the minimum a simple first aid kit should be the first thing you pack. Should you sustain an injury in the course of the trip you should be able to treat yourself until you are able to get outside help. Plan to be able to treat something from a simple headache to putting a limb in a splint.
Keep basic medicines to hand
When you are camping especially in areas where cell phone reception is limited you should have basic medicines to hand. Saying that if this is your first camping trip alone we’d recommend not going too far off the beaten track. Some of the risks you can be subjected to include bee stings, sun burn, a fall, sprains, basically injury or illness.
There are numerous ready made basic first aid kits available on the market from brands such as Coleman. But don’t just pay your $10 and think job done, take care to really consider what you should include. Consider at least the following;
- Band Aids / Sticky Bandages
- Scissors
- Ibuprofen / headache tablets
- Insect / mosquito repellent
- Antibacterial spray or ointment for cuts
- Sunscreen
- Lip balm
- Hand sanitizer
- Bandages for wounds
- Sterile pads
- Medical adhesive tape
- First aid manual or book
- Throat lozenges
- Poison ivy treatment
Plus don’t forget any prescription medicines that you take.
Protective Clothing & Gear
Other than a first aid box to protect yourself from potential injury you could consider protective clothing. You should take serious precaution as you walk. If you walk through the bush consider wearing hand gloves. Footwear should be secured and laced up correctly and ideally should incorporate ankle protection. A sprained ankle on your own miles away from anyone is no fun at all and potentially life threatening.
Clothing wise you should pack for hot and cold to protect yourself against the vagaries of weather. Everything from sunglasses to a rain jacket should be in your back pack.
Food & Drink
If like we recommend, your first camping trip alone is at an established campground, then you should only need to take basic provisions and cooking equipment. This might include snacks and small items to add flavor and seasoning to supplies you purchase at the campsite.
Food for the duration of the trip
If however you plan on venturing further afield and maybe this isn’t your first solo trip then you will need to take a more thorough supply of food and drink. You’ll need to take as much food and drink as you’ll need for the duration of your trip.
You should pack a healthy balance of proteins, carbohydrates, fruit and vegetables plus plenty of fluids. Plus you’ll need the gear to cook and clean with. See this list of pro camping tips to really get ahead of the game.
You’ll need a means of purifying water
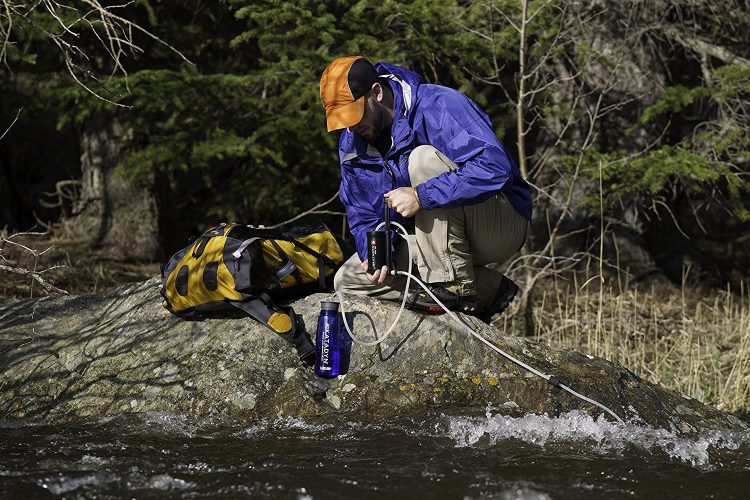
If you don’t plan to carry water in a Camelbak or similar you should ensure water purification tablets are part of your kit. Alternatively for around $10 consider a LifeStraw, better still go for a pumping water purification device that can rid dirty water of all contaminants.
At the very least you’ll need the ability to heat and boil water. Undertaking research of the area you plan on camping in, if wild camping, will be time well spent.
A word to the wise consuming alcohol while camping alone in isolation should be avoided. A trip or fall while under the influence could have devastating consequences.
Physical Attack
Although highly unlikely it is an important safety concern to consider the possibility of attack by beast or even from fellow humans. Because of that, you should always beware of large predators, as well as poisonous creatures that can endanger your life. Take care when hiking out alone, don’t be overturning rocks where snakes or dangerous insects could well be. Limit the risks you need to take.
Don’t become a target for an inquisitive bear
In Bear country store foods away from sleeping quarters and in sealed containers. Don’t leave waste hanging around. You may even want to setup a perimeter wire to warn and startle any creature that accidentally crosses your path.
If you are camping in an area where other hikers or backpackers pass by you may want to give the illusion that you’re not alone. Setup 2 places for dinner, hang clothing of the opposite sex from a washing line, you get the idea.
Pre-camping Safety Checks
Even before you set off camping, you should take safety measures to ensure that you are protected. It is in your best interest to inform a couple of people where you plan to go and when you’ll be returning, before you set out on the journey.
If there is a local authority like a local ranger service then you should inform them of your movements, check in and check out. Also take note of any local safety information available.
If you are a lone female camper these precautions are even more vital as unfortunately you are more of a target than a lone male.
Camping Alone Benefits
When you have taken care of the safety issues, you will more likely appreciate the benefits of solitary camping.
- It makes for self reliance. Perhaps the greatest benefits that you can derive from it is that it will help you develop your self reliance ability. This means that you would no longer depend on other people for this type of activity.
- A unique experience. There is a peace and tranquility that accompany this type of camping that is unrivaled you will enjoy nature to its fullest.
- It helps with personal growth. Every individual deserves a unique opportunity for personal growth. Solo camping is the opportunity waiting for you. You are going to grow through introspection.
- Discover and understand your own limitations. Most importantly, it is going to help you to find out those mental and physical limitations unknown to you and will also reveal inner strengths.
- Share experiences on your own. You are not going to share anything with anybody. It means that you are going to have things all to yourself.
- Develop your camping skills. Anytime that you engage in this type of vacation you’re going to have to undertake every activity and chore from lighting the fire, to cooking and cleaning and being prepared for whatever will confront you. This would not have been the case if you were part of a group where tasks are shared.
- Can enhances your intuition and reasoning ability. Moreover, solitary camping has the capacity to sharpen your intuition. You are going to be curious of any noise and any movement around you you will become used to the sounds and site of potential danger. Overall this can help improve your decision making ability.
- Flexibility. Solo camping offers the freedom to do what you want and at the time that you want to. Because you are alone, nobody would stand in your way to achieving the happiness and joy you deserve. It offers you the space and freedom to do those things that can please you, and keep you happy.
- Personal reflection. It is a great opportunity for sober personal reflection. You may need a moment to be alone, perhaps in an isolated place to have a review of things around you and think of how to forge ahead with your life.
If you still like the idea of camping alone then go for it. It is a unique experience that you will either love or hate. Do follow the advice about gear and safety equipment and buy the best possible quality you can afford.
Wednesday, 19 September 2018
Of ponchos and tarps - your rainy camping checklist
Of ponchos and tarps - your rainy camping checklist

Pffft. What did we just say about socks?
We’re obsessed with wet weather this week, as the dampness of the Jubilee celebrations winds down and as the rain beats relentlessly against the window. We’ve plenty of tips for rainy camping with kids , but if you want a more general guide or tips on what to bring with you, read on. And as always, plastic resealable bags.
- Did we say socks? We’re going to. SOCKS . And say it again – for the love of the rain gods, the first item on any wet weather packing checklist has to be socks. Thick pairs, inside the tent pairs, knee high pairs for under Wellies… just bring plenty of socks. This even – or especially – applies if the weather forecast says the sun will be splitting the stones for your week away, as you don’t want to be stuck with only the thin socks you wore on the journey and a pair of useless (and wet) flip flops. We speak from bitter experience here.
- Waterproof gear is an obvious one, but don’t be fooled into thinking that means you can get away with a thin peach-coloured poncho bought at the last minute from the service station. You’ll need the full shebang if you’re planning to camp in wet weather (or camp) – waterproof trousers, jacket with hood, and Wellies or already-tested waterproof boots, as well as something you can quickly pull on when you arrive to stop you from getting wet while you pitch the tent. You can get waterproof gear cheaply enough nowadays online and you don’t even have to worry (too much) about looking like a geek – just take the outer layers off when you get to the pub.
- Tent : yes, we know you know to bring a tent, but check before leaving that the tent is waterproof, especially if you haven’t used it for a while. Pitch it in the back garden, take the hose to it then climb inside to see if there are any leaks. These are normally easy enough to fix with seam sealer, self-adhesive tent patches, reproofing kits or even needle and thread for small holes.
- Tent (again) : If you’re buying a tent for the first time, try and get one with a porch area where everyone can shed the waterproofs after getting back to base. (Please do not use the fact that you don’t want to get the inside of the tent wet as an excuse to strip down in public to your underwear. Again, we speak from bitter experience.) Keep all waterproof and outdoor gear in the porch, add a flattened cardboard box as a doormat so feet are nice and dry before going into the tent, and keep a towel handy there for drying off hair if need be.
- Extra groundsheet : Put this under the tent for added protection against damp. You can also use extra blankets under sleeping bags to make sure everything’s kept dry.
- Tarps : Bring at least one or two tarps and stakes/rope if you have room. You can use a tarp under your tent instead of the extra groundsheet – just make sure it’s fully tucked in underneath as any parts sticking out will create a funnel and bring water inside. Or you can put one up over your tent to keep the rain off, or one outside to act as a shelter while you try and get the campfire lit.
- Sticks and clothesline : In happy weather, a clothesline is normally stretched between a couple of trees, but here it be raining. Put up a tarp outside the tent and erect a clothesline under it using a couple of sticks so that clothes can dry. If the air is really damp clothes might not get as bone dry as they should, but they’ll warm up within a few minutes of putting them on.
- Extra backpack/day bag : Backpacks can be hard to get dry, especially if it’s still raining and you have to keep them inside the tent overnight. A damp backpack isn’t going to be too much of a problem for carrying things like bottles of water, but for maps, notebooks, pens, cameras and the like it can get a little too steamy inside. If you’re able to bring a spare, do. You can even pack it inside the other backpack. Genius.
- Er, pee bottle : Or ‘portable urinal’, as Amazon more politely calls it. We’re not (just) being lazy with this one, we swear…trips back and forth to the toilet block at night when it’s raining are inevitably going to bring some rain back into the tent, so unless you’re at a very early stage in your relationship these are a godsend. Just be sure to get one each so there’s no fighting over it. (Ewww.)
- Laptop/DVD player/books/games : You can be as hardy as you like camping in wet weather and determinedly trekking the hills and dales around you in a downpour, but there will be a time when you and your former loved ones are confined to canvas barracks only a foot or two away from each other. For hours. Entertainment is your saviour here, or will at least keep you out of prison.
And, as we said in the rainy camping with kids blog, if your camping trip normally involves cooking on a campfire , bring plenty of food that doesn’t need to be cooked or heated up – or at the very least add a cheap restaurant or chippy meal to the budget. It may be raining, but you should always have chips. And whisky. It keeps you warm.
Tuesday, 18 September 2018
Monday, 17 September 2018
How to Start a Fire with Wet Wood
Wet wood is a problem when starting a fire, but like all problems, there are solutions.
One solution is to use a solar cooker.
Or, you can face that wet wood and burn it anyway! Let’s look at how.
The Problemhttps://knowpreparesurvive.com/survival/start-fire-wet-wood/
Nearly everyone knows that water is bad for fire, but not everyone knows why. We’ll touch on that here.

There are three factors required to have fire: heat, oxygen, and fuel.
Wood is the fuel. Air supplies the oxygen. You provide the heat. We’ve covered how before, both with modern tools and using primitive skills.
Water, however, robs us of that heat. It takes over twice as much energy to raise the temperature of a gram of water by one degree Celsius as it does to raise the temperature of a gram of wood.
Then the water in the wood evaporates because its evaporation point is much lower than the wood’s kindling point. Evaporation cools the wood slightly, setting you back even further.
So you can burn wet wood, but you have to put a LOT of energy into drying the wood before it ignites!
There are other things you can do as well, so you don’t have to fight the water in the wood. We’ll start at the bottom.
Keep the Foundation Dry
If your supply of wood is wet, the ground is very likely to be wet as well.

Trying to start a fire on wet ground is an exercise in futility. One of the easiest things you can do to start a fire when everything is wet is to work towards making a dry fire base.
Clear out any snow, wet leaves, and mud. You might be able to find dryer soil underneath the top layer, so dig a little bit.
If you can find dry pieces of wood–we’ll explain how in a little bit–then lay several logs out and build your fire on top of that. By the time the fire burns down onto the ground, it should have dried out its immediate path.
Low-hanging branches and chunks of bark spread over the ground can also keep your fire from touching the moist earth.
You can also use something flat and dry as a base. Build your fire on a piece of cardboard or even some dry cloth.
If the initial surface is wet then your fire won’t take hold. Don’t be afraid, in a survival situation, to sacrifice dry resources so you can produce the fire necessary to keep you warm and dry.
Torn pieces of clothing can be used for the dry base and can also be used as dry tinder if you can’t find enough dry wood.
Speaking of tinder, unless you’re burning magnesium, you need to keep the tinder dry as well.
If the weather is still spitting rain at you then it can be worthwhile to create a teepee of kindling above the tinder to help deflect raindrops.

Other cover above that will also help keep water away, but be smart about it. Do not start a fire under low hanging branches or close to a flammable tarp. We don’t want to set the trees or equipment on fire.
This technique may not help you in a deluge, but in that case, I’d probably be trying to find high land instead of starting a fire anyway.
Find Dry Wood
Even when the sky is pouring water onto you there is still dry wood to be found in the forest. If the rain has stopped then all the better.
Your best bet to find dry wood is to keep an eye out for dead wood that has not yet fallen on the ground.
The ground retains moisture, which seeps into wood laying on it. A log that is half buried in the soil is most likely a wet, rotten mess.
A fallen tree that is only touching the ground in a few places may have dry wood in the parts not touching the ground. Better yet, look for dead trees that have not yet fallen.
If you channel your inner hockey player and knock over the dead tree with a shoulder check then you know that’s some nice and dry wood.
Though, it might be safer to push the dead tree down instead of slamming into it with your shoulder…
You can also find good fire starting branches on live trees. As they grow the lower branches lose access to sunlight and often die.
If the branch snaps easily then it is dry and a good piece of kindling. If it bends or has a hard time snapping then it’s either still alive or is wet, and you should move on to another branch.
These dead branches are low enough to the ground to be easy to harvest, are protected from rainfall by the rest of the canopy, and are a good source of fire starting materials.
But branches don’t make for long-lasting fires; we’ll need some logs. Knock over those standing dead trees, and chop up the fallen trees which are barely touching the ground.
Don’t always ignore logs which are wet on the outside, because there might be dryness on the inside! I would have had to sleep through many cold nights if I had ignored every piece of wood that looked wet on the outside but turned out to be dry within.
Dry Wet Wood
You can burn wood that is wet on the outside. When the wood is fully-soaked and rotten, it’s a lost cause.
When you cut up logs from the dead trees into manageable sizes, make sure to look and see if there’s dry wood in the middle of the log.
If it’s wet all the way through then move on to another tree. If the inside is dry then use the wood, splitting or batoning the logs.
The more pieces you split the log into, the more dry surface area there will be. The pieces will burn more easily but will also burn more quickly.
There are three methods you can use to deal with the still-wet outside of the wood pieces.
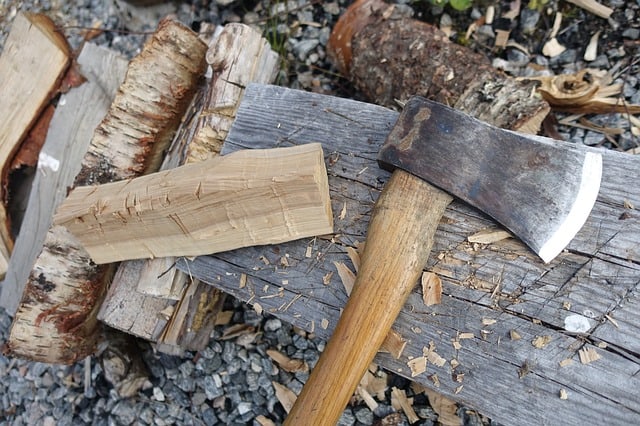
If you need dry and burnable logs right now then use a hatchet or similar tool to hack away the wet outside. Be careful of your hands, we don’t want to lose any fingers!
You’ll trim down the wood but will get enough dry wood for a fire soon enough.
You can also stick the pieces of wood directly in the fire. If you’ve split the logs a bunch, so there’s lots of dry surface area, this will likely work. The moisture will be too little to seriously slow down the flames before the wood dries out completely.
Just be sure not to add too much wet wood at once to a fire else you will smother the flames.
A word of caution: pockets of water in the wood will expand as they heat up. This will cause sparks to burst out of the fire. I’ve even seen a miniature splinter explosion, it was quite exciting.
If you have a little more patience and need to dry wood for a fire that is already burning away then simply place the wet outside close to the flames.
The heat of the fire will warm up the moisture in the wood and cause it to evaporate. Provided the wood isn’t soaked through you should be able to keep a fire going by constantly drying out the next batch of logs.
Manage your firewood and stay on top of things so that you are constantly drying new pieces of wood. Unless you want to suddenly run out of burnable wood. Ask me how I know…
Conclusion
Even if you are exploring a rain forest you can still start a campfire.
Dry wood is more common than you think, hiding between the canopy and the ground. Wet wood is often less wet than you think, and with some splitting and hacking, the dry core can be exposed for use.
Keep these in mind next time you are disappointed by some unexpected rainfall in the woods and you will be able to go to sleep with a warm fire crackling away.
Subscribe to:
Posts (Atom)
Wild Camping Tips and Kit List
The first rule of Wild Camping club is... actually really simple! Leave No Trace: if you take it in, you carry it out. What is wild camp...

-
The first rule of Wild Camping club is... actually really simple! Leave No Trace: if you take it in, you carry it out. What is wild camp...
-
How to Start a Campfire: Ultimate Guide Me make fire. Fire good. Fire bring warmth and cook food. Our relationship with fire spans back...


