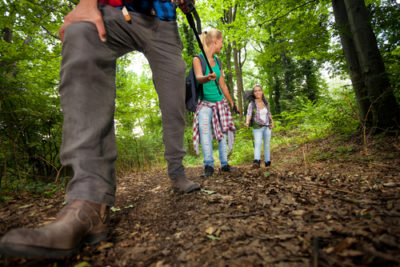
Wild camping is a fantastic way to get children out in to the natural world and engage their imaginations. So whether you're interested in a back garden campfire or getting lost in the forest. Jo Schofield and Fiona Danks offer a guide to finding a campsite and building a shelter, and then show you how to make fire and get cooking.
Building a one-person leaf hut
It only takes a couple of hours to build a well-insulated and waterproof shelter using nature's ready-made materials - you don't even need a knife. This shelter is designed to conserve body heat and will even keep out the rain. The smaller it is, the quicker it warms up.
Choose a site - ideally a tree with a fork or notch about 1m (39in) off the ground. Make sure there are no standing dead trees nearby. Prepare the ground by taking a few minutes to clear away sticks and stones. Find three long, reasonably straight fallen branches. Place the end of the strongest branch into the fork or notch, and the other end on the ground; this is the ridgepole. Our boys wedged their ridgepole between the trunks of two trees growing right beside each other. Place the other two branches on the ground parallel to the ridge pole but wide enough apart for someone to lie between. Collect masses of dead sticks and line them up along one side of the frame to make a wall. The closer they are together, the warmer and more waterproof the hut will be, but don't let them extend beyond the top of the ridgepole.
Do the same on the other side, but leave a gap of at least 50cm (20in) near the tree trunk. This will be the entrance. On each side of this gap push two forked sticks into the ground. These will support a roof over the entrance, constructed in the same way as the rest of the shelter. Cover the whole shelter in fallen leaves, starting at the ground and working upwards. If you have a tarpaulin, use it to carry the leaves to the shelter. The thicker the thatch of leaves, the warmer and drier you will be.
A well-made leaf hut lasts for months, so in order to leave the wood as you found it, dismantle the shelter before you go home.
The DIY tent
Our families celebrated the summer solstice by camping out. There wasn't a cloud in the sky, so our DIY tent just had to keep off the dew. Once the shelter was up and we had installed groundsheets and sleeping bags, we gathered round the fire on rug-covered straw bales for a feast of curry and smoked fish, washed down with beer and elderflower cordial. Under that DIY tent we could smell the damp earth and hear all the night rustlings, and the following morning we watched the sun come up, accompanied by the dawn chorus.
What you need
Camping like this doesn't require expensive gear and gadgets, just a few basic tools and some simple equipment: an axe and bushcraft knives; large tarpaulin or sheet of plastic; rope or paracord; groundsheet or sleeping mats or both.
Cut two poles of hazel, about 2m (7ft) long. Sharpen one end of each pole. Make some tent pegs out of shorter lengths of hazel about 25cm (10in) long, sharpening one end and carving a notch in the other. Choose a suitable location for your shelter on level ground. Push the sharpened end of one of the poles into the ground and hold it in place. Push the other pole into the ground 2m-3m (7ft-10ft) from the first one, depending on the size of your tarp.
Fasten a length of rope between the poles, tension it and tie it securely on to each pole, creating the ridge. Attach two guy ropes from each pole to secure them firmly in place. Slide the tarp or plastic sheeting over the ridge until there is the same amount of material on each side. Attach short guy ropes along the sides of your DIY tent, and secure them in place with pegs.
How to go wild camping
Camping wild is a wonderful way to experience the natural world and, at its best, it makes little environmental impact. But with increasing numbers of people wanting to escape into the wilderness, it is becoming more and more important to camp unobtrusively and leave no trace.
Why do you need shelter?
Before you make your shelter, consider the weather forecast and what you need the shelter to do. Does it need to keep you warm or cool? Does it need to keep you dry? Does it need to keep you safe, or keep insects and other creatures away? Even in summer the ground can get cool and damp overnight, so perhaps you need to make a bed to prevent heat loss. Sometimes you won't need a shelter at all; there's nothing quite like sleeping under the stars on a warm, still night.
What sort of shelter?
Don't over-complicate things. Shelters should be easy to construct and they must do the job you want them to do, using what's around you or a tent or tarpaulin you have brought with you.
Finding places to camp
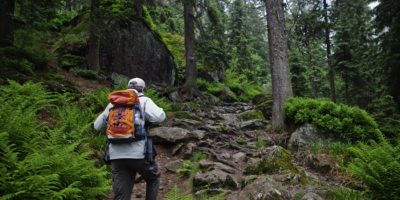
Wild camping is not permitted in many places, particularly in crowded lowland Britain. Wherever you are, find out about organisations responsible for managing wild spaces, and contact them to find out their policy on camping and shelter building. For example, it's fine to camp wild in remote parts of Scotland, but in England you must ask the landowner's permission, except on some large estates and national parks. Camping is about getting away from it all, sleeping outdoors, experiencing the elements and making do without modern conveniences. A busy, fully equipped campsite seems at odds with this, so seek out smaller, more remote sites with easy access to open spaces and perhaps beaches. Better still, find a campsite with no road access: walking in makes a real adventure and you may be surprised by how little gear you will make do with when you have to carry everything on your back.
Locating your shelter
Soon after we had pitched our tent one evening, it began to rain, and continued raining all night. Poking our heads out the next morning, we found that we were surrounded by water; our tent happened to be on a slightly raised piece of ground, but the rest of the low-lying marshy field was flooded. Finding the right spot to camp is the first step to guaranteeing a good night's sleep. Choose a discreet campsite with privacy and minimal impact on others and the environment. Try to use an area where people have obviously camped before rather than creating a new site. When camping in woodland, avoid standing dead trees, which may fall on a windy night. Avoid animal runs and burrows, and possible sources of biting insects, such as marshy ground. Make sure you have most protection on the windward side. If you make a fire, do so downwind of your shelter. Always consider what impact you might have on the natural world. Avoid damaging plants. A good campsite is found, not made - altering it should be unnecessary.
Other ways of wild camping
If you don't feel confident about wandering off into the middle of nowhere to camp wild, why not try it out first by joining a trip led by others or by contacting an organisation that runs courses? We found the Wilderness Gathering, held on an English farm over a late summer weekend, particularly inspiring.
Organisations offering camping expeditions in the UK include the Woodcraft Folk, The Duke of Edinburgh's Award, the Scouts and Guides, Forest Schools or the John Muir Trust.
Some outdoor centres offer opportunities to have a go at bushcraft activities. It's worth finding out what conservation organisations offer - for example, local wildlife trusts, national parks and in the UK the Woodland Trust, the National Trust and the Forestry Commission.
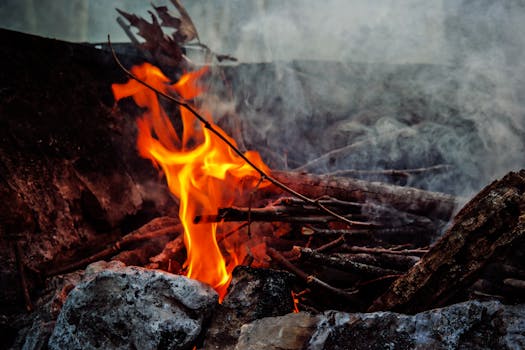
Safe, low-impact fires
"White man make big fire, sit far away - black man make small fire, sit close." The old Aboriginal saying reminds us that you only need a small fire for warmth, cooking and a cheerful glow.
How about a fire in the garden? Fifteen-year-old Jake had invited a crowd of friends round for a party in the garden and felt it would not be complete without a fire.
They lifted turfs and topsoil from an area about 1m (39in) square, leaving it to one side ready to re-lay later, and made a fire on bare soil from wood from the garden.
After a big fry-up the following morning, they dowsed the fire until the ashes were cold. They then mixed and loosened the ashes and soil before replacing the topsoil and turfs and watering them. Although the grass completely recovered after a few weeks, we would only recommend this for rougher areas of garden.
At a bushcraft gathering we saw many small fires being made in a field, but because they were made in a low-impact way, there was no sign of them once all the turfs had been neatly replaced. To improve the recovery of a sward after a fire, make the pit larger than you require and place overturned turfs all around the rim to stop the surrounding grass from being scorched.
Fire without matches
We suggest that young people only try this once they have mastered making a good fire using a match. There are many different tools and techniques for fire starting, all of which produce an ember to ignite fine tinder. Making this ember into a fire involves the following: before you produce the ember, prepare a tinder nest - some fluffy material in a bundle of dried grasses. Once the tinder nest is ignited, lift it in cupped hands and blow softly until a small flame appears. Place the burning tinder on a stone or piece of bark and continue to blow until it is burning well. Now transfer this into a prepared fireplace and gently build a tepee of kindling over it, building up your fire slowly.
Jake tried making fire using a hand drill, one of the world's oldest and most widespread friction methods. He made a long, smooth hazel drill and prepared a notch on a base plate, and then twisted the drill between his hands. Despite great determination he didn't succeed; it is difficult to maintain the friction for long enough. It works best in hot climates with very dry wood. Make a long drill as straight and smooth as possible - rough bits can cause blisters.
Make the base plate or hearth as above, from the same type of wood as the drill, and carve a small notch. Place an ember tray beneath the hearth, as above. Rotate the drill between your palms with a steady downward pressure, working from top to bottom. Spit on your hands to improve your grip and help maintain the friction.
Agnes had made fire by rubbing one dry stick against another along the grain of a piece of wood. To do this, carve a flat surface into the larger stick and then start to move or "plough" the drill along the grain, creating a groove and gradually increasing your speed. The theory is that this produces tinder and then ignites it, but it is not as easy as it sounds.
Cooking methods
Cooking straight on the fire
For cooking, you need a bed of hot coals; flames just blacken food. Light your fire well ahead of time; it takes a while to build up the hot coals. Make sure you have a supply of dry firewood close by. Having built up your fire, use a log or spade to drag a load of hot coals from the middle to the edge; this bed will become your "cooker". Keep the main fire stoked up to create more coals if you need more heat later; you can also increase the temperature of your cooker by fanning it. Make sure your cooking pots are solidly placed on the coals, possibly supported by logs on each side.
Using a potholder
A potholder allows for more even distribution of heat than cooking directly on the fire. Some metal potholders have a chain with which to suspend the pot over the fire; the height of the pot could be varied according to needs. If you don't have a metal potholder, make one out of three sturdy sticks and a chain or piece of strong cord.
Making a dutch oven
We put a cast-iron cooking pot in the heart of the fire and scraped burning wood and ashes all around it to make a Dutch baking oven. The bread we baked was a little burned on the bottom, but we could have prevented that by placing another smaller pan inside to help spread the heat more evenly. Try using a Dutch oven to bake loaves of bread, vegetables, biscuits or even cakes.
Cooking on a metal grill
A sturdily placed grill provides a convenient surface to cook on. Either place the grill over two logs, making sure it is level and stable, or make your fire in a trench and place the grill directly on the ground over the top. Another handy piece of equipment is a double grill with a handle; you can sandwich bacon or sausages inside the grill, which is easily turned over, so you're not likely to lose any supper in the fire.
Cooking on a stick or a spit
Roasting marshmallows on a stick is always popular. To cook bread dough, meat or fish, try using peeled green wood skewers. We rolled this bread dough into a sausage shape and wound it round a cooking stick, which we held over hot coals, turning it occasionally to ensure even cooking.
A friend told us she has cooked sausages on green sticks pushed into the ground beside the fire and tilted towards the heat. Other than turning them a couple of times, you can just leave them to cook. Alternatively, try constructing a simple spit: bang a forked stick into the ground on each side of the fire, make sure the forks are at the same height and then place a third stick across them. You can either hang a pot from this or peel the "spit" and thread your food along it for cooking.
What to cook - basic bread mixture
For a savoury version, add salt and perhaps wild herbs, cheese, olives or sun-dried tomatoes just before cooking. If you have a sweet tooth, try adding honey, dried fruit or chocolate chips.
2 cups of self-raising flour
1 cup of dried milk powder
Up to three-quarters of a cup of water.
Add water a little at a time to the dry ingredients, mixing steadily to produce a non-sticky, kneadable dough that leaves the sides of the bowl and your fingers clean.
Knead the dough on a wooden board, until it is elastic and smooth. Roll the dough into sausage shapes and then wind it around a peeled green twig and cook over the fire for a few minutes. The dough spiral should slide easily off the stick when it is ready. Alternatively, make your dough into bread rolls and bake in a Dutch oven for about 20 minutes.
What to take
There is much conflicting advice, but we feel there are some things you should always carry, and which you may need depending on the season, terrain and length of expedition. Keep your wits about you and use common sense. Know more and carry less.
A few essentials
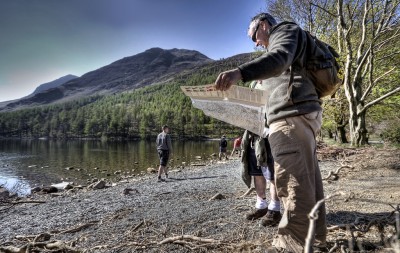
Water: without it, adventures can be unpleasant at best and life-threatening at worst. A compass: unlike GPS, a compass needs no batteries. A good map of the area. A first-aid kit. A knife.
Other useful equipment
Fire starter, such as flint and steel with dry tinder and matches in a watertight container. Extra clothes and waterproofs. Hats and gloves are particularly important. Children get colder faster than adults, so pack more clothes for them. Sun hat and high-factor sun cream. Torch with extra batteries and bulb or candles or both. Extra food - always take more than you think you will need. Lightweight plastic bivi bag. Sensible footwear, such as walking boots. Waterproof backpack in which to carry your gear. A sleeping bag and sleeping mat; the ground can get cold and wet overnight. Tarpaulin and parachute cord (handy tip: put it in a plastic bottle to keep it neat and untangled) so that you can make a shelter.
Pack for the best-quality experience; if you have a creature comfort you can't do without, take it along - but remember that you will have to carry it. You don't need masses of gear: only take things you will use or which are vital for an emergency.
• Go Wild! by Jo Schofield and Fiona Danks is published by Frances Lincoln, £16.99. To order a copy for £15.99 with free UK p&p go to theguardian.com/bookshop or call 0330 333 6846