So we've dealt with where to go and how to make yourself comfortable for the night. But one cannot operate on fresh air and a good night's kip alone, or not for very long at least.
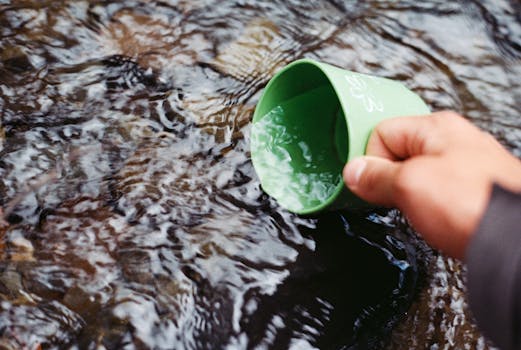
So your first priority is water. Often overlooked and under-consumed on expeditions. I have found people are especially prone to dehydration in cold climates. In the desert heat everyone is very aware of the problem and is disciplined about drinking. But when you're cold it seems less pressing. Hydration is key to staying healthy on trips, short or long, everywhere in the world. But for the purposes of this blog we'll assume you're wild camping in the UK.
You have two choices: a) take it all with you - ok on short trips or if you're traveling by vehicle e.g. kayak or car, or b) collect along the way.
If you're taking it all with you, bear in mind a litre of water is 1kg. For cooking and drinking in 24 hours where you're working hard in the day you could be looking at 5kg. Personally, with the state of my knees and back, I don't want to carry any more weight than necessary. If you are traveling by some form of vehicle then you can carry the weight dependent on the vehicle i.e. I'd happily carry more in a kayak vs a bike and a car vs a kayak. I use water storage bags a lot as their flexibility allows me to cram them into awkward spaces (e.g. behind the seat of my kayak) and they also diminish in size as you use up the water unlike a hard case bottle. You can even get fittings for them to turn them into showers and if you select a black one, as black absorbs the heat from the sun well, leave it out all day and you'll have a hot shower... although this may not work so regularly in Britain.
But since we're assuming you're UK based for this trip I have some good news. It rains a hell of a lot here so water is seldom a scarce commodity. This means you can collect on the way.
The first thing to bear in mind is the best place to store water is in your stomach so if you find a good source drink your fill before filling up whatever carrier you have. This means you'll leave your water source fully hydrated. I would also say fill up whenever you get the chance rather than waiting until your water bottle has run dry then trying to find a refill spot.
When your deciding how much water to carry it's a compromise between how much you'll need (affected by how hard you're working and the environmental conditions), how much weight you're happy to carry and how far it is between likely refill spots. You may decide to carry nothing if you're walking through streams every 10 minutes or three litre bag if you know you'll see nothing all day. You can also consider your destination. If I know that when I finish I can fill myself with fluid I'm happier accepting a certain level of dehydration through the day and carrying less water. Personally I'd recommend between one and three litres depending on the length of day, weather and number of potential water-stops. I like to carry at least one of my water containers easy to hand with a drinking tube, like the Camelbak type. If you have to stop, take your pack off and get a bottle out for a drink the chances are you won't bother. The easier you make it for yourself the more likely you are to drink. And hydration is key.
These aren’t as interesting or obvious as the rest of the gear, but just as important. These are the little things that if overlooked can cause more hassle than you’d imagine. Get these sorted and then you’re about ready. Of course, you’ll need all the stuff you take on a day walk in the area remembering that it gets colder at night, plus a few items of spare clothing. I usually take a spare base layer, pants and socks but you might want to double up on these, and just my waterproofs, ultralight windproof, a fleece and a down top. A hat of some sort is useful all year round, and gloves for all but the warmer evenings.
Anything with batteries will need spares. Lithium batteries are lighter than conventional ones and are the best option in the cold when other batteries will die of cold. You may consider a solar charger for your mobile, mp3 player or to recharge batteries.
First aid/repair kit. You’ll need a few bandages and plasters, but don’t take a load of stuff unless you know what it’s for! I find that some painkillers and antacid tablets useful as well (and unlike the plasters, likely to be used). Some cream for bites is useful as is a bag of talc that you can fit your foot into. After a long walk when your feet are sore and hot, you’ll understand! Depending on time of year, a midge net is light but essential. Antibacterial gel is useful and can save you from a dodgy stomach, not pleasant in the wilds. Spare laces might be useful, or some spare guyline. Finally some needle and strong thread, gaffer/duck tape and a few assorted cable ties mean that you’ll be more inventive than McGyver. Some basic toiletries – soap, toothbrush and toothpaste should be enough, depending how long you’re going to be in the wilds. A small microfibre towel is worth carrying as well. You’re probably better off growing a beard rather than taking shaving stuff, and that goes for the men too.
You’ll also need a torch (for obvious reasons) and some sort of entertainment won’t go amiss. I take a tiny MP3 player that lasts for days on end. Audio books are useful, real books too heavy but a luxury you might want. You can use a mobile for all these functions if you don’t want to carry too much stuff. A camera is an option, but surely an essential? If not, your mobile is again an option.
Dry Bags and stuff sacs. In order to organise all your stuff these are invaluable. Anything you don’t want to get wet you put in a dry bag (money, phone, etc) and all else in a stuff sac in order that you’ll find it later (repair kits). You can also get giant dry bags that fill the rucksack in order to protect everything. I use one of those and individual bags to be safe. It really wouldn’t be overkill if you put a pack cover as well, it all helps keep water out.
WHERE and how TO CAMP?
I’m intentionally leaving this one up to you. Have you seen a nice flat grassy spot on one of your walks? Is it in the wilds? Is it sheltered, or will you need to go in decent weather? Is there a decent view? Is there water near by or do you need to lug it up, usually the case for summit camps. Have a search online in the area you want to go and you’ll certainly come up with plenty of ideas.
If you do find somewhere to wild camp, follow some sensible rules that ensure you leave no trace. This may seem common sense, even down right patronising, but if you visit some of the popular wild camping spots and see the mess that’s been left by irresponsible individuals and groups (who are, thankfully, in a minority) you’d understand why.
You will need to be aware of the laws and un-written rules of wild camping. It is technically illegal to wild-camp without the land owner’s permission. Unfortunately, the Right to Roam act failed to provide the common sense access laws that Scotland have, where wild camping is now legal within reasonable limits. However, it is tolerated in most upland areas provided that people observe some common sense. That said; remember that you could still in theory be asked to move along by the landowner.
Camp high, not in a field full of grazing cows next to the farmhouse.
Camp late and leave camp early.
Leave no trace. Your site should not be an obvious campsite the next day. Take all your litter out.
Fires are generally a no-no. You might be ok on a shore where the signs will be washed away, but dont light one if in doubt.
In dry spells, you’ll need to be extra careful with your cooking stove in case you start a grass or heather fire. In exteremely dry conditions you might need to avoid such areas.
Human waste should be deposited 200m away from water and solids buried. Paper should be burned (but beware the fire risk), or if you use wet wipe tissues, then you can double bag them out. Yes, this sounds disgusting, but you will have a rubbish bag anyway, so they’d be in that too (triple bagged). I’ve not had problems yet. Better still, use sphagnum moss!
That out of the way, you can really get to grips with the mountains when you can stay there after everyone else has gone home. It will often be just you and the hill. You need a water supply (or at a pinch, a decent single malt), a dry and flat place to pitch, out of sight of buildings and ideally with a cracking view.
Want spectacular landscapes all to yourself? Try one of these wild camping adventures – perfect for the UK's lengthy summer evenings...
New book Wilderness Weekends offers expert advice on everything from finding little-known wild camping spots and bothies (remote, free cabins found across the UK), to packing the right kit and navigation. Written by Wanderlust editor Phoebe Smith, it also suggests 26 trips, with maps, that will enable you to wake up to a five-star wilderness view, all of your own. To celebrate the book’s release, we’ve picked four of our favourites...
Stay on a secluded beach
Sutherland, Scotland Sandwood Bay is one of the most secluded beaches in Britain, an arc of golden sand sheltered by imposing granite cliffs.
“Anywhere else in the UK there would be a giant car park, deckchair kiosks and donkey rides,” says Phoebe. “But, because of its location, remote even for the far north of Scotland, Sandwood remains completely unspoilt. It lies 5km from the nearest road, along a track that skirts a chain of lochs before winding down to the shoreline. Once there, you can pitch your tent among the grassy dunes and take in the view.
“Sandwood is part of a Special Area of Conservation, rich in animal and plant life. Keep your eyes peeled for deer, puffins, razorbills and guillemots, along with the eight different varieties of orchid that grow among the coastal grasses (machair). If local legends are to be believed, you might even spot the odd mermaid.”
The Priest's Hole cave, Lake District(Photo: Phoebe Smith)
Camp in a mountain cave
Patterdale, Lake District For a night or two, you can live the life of Millican Dalton, a self-styled Professor of Adventure who left a respectable London job in the 1930s to become of one of Britain’s most famous cave-dwelling hermits. Millican made Borrowdale, on the lower slopes of Lakeland’s Castle Crag his home.
“Caves tend to be at the bottom of hills, hidden underground or beneath boulders,” says Phoebe. “But find a cave up high, on the side of a mountain, and you’ve found somewhere special indeed. Priest’s Hole, a natural cavity located high up on Dove Crag is just that. On a clear day, the view is as breathtaking as the climb. It’s like having a penthouse view over the northern Lake District.”
Sleep among ancient stones
Erme Plains, Devon Dartmoor National Park has a double draw for wilderness explorers. “It’s the only place in England where you can legally pitch a tent for a wild camp (thanks to a local bylaw) and it’s also home to some the country’s most intriguing archaeology,” explains Phoebe.
“Scattered among marsh land and weather-beaten granite tors you’ll find many ancient cairns, evidence of the tin mining that this area was once famous for, and the largest concentration of Bronze Age remains anywhere in the UK.
“The Upper Erme Stone Row is one of the most spectacular of these prehistoric relics. Stretching for over 3km, with a stone circle made up of 26 monoliths at its southern end, it’s the longest stone row in the world and provides a fascinating insight into Dartmoor’s ancient past. Pitch your tent nearby and explore.”
Visit an old Shepherd’s hut
Carneddau, Snowdonia “People often bemoan the lack of ‘true wilderness’ in Wales,” says Phoebe. “Many people tend to think of the Snowdon tourist trail, which deposits trainloads of visitors on the summit of Wales’s highest mountain with barely any of the required effort. But not far away are the Carneddau, an expanse of high land that is home to wild horses and few visitors.
“The area also offers the rustic hospitality of a former shepherd’s hut, maintained by the excellent volunteer-run Mountain Bothies Association. A stay here is free for wilderness explorers as long as you follow bothy etiquette: only stay one or two nights; keep numbers to a minimum (no more than six without permission); make all visitors welcome; take out all your rubbish with you.
"It’s the perfect base to explore the heatherclad peaks. Facilities are very basic – think stone tent rather than hostel – and you’ll have to take all your supplies in with you, but it’s a small price to pay to wake up in the wilds of Wales.” Source: https://www.wanderlust.co.uk/content/4-of-the-uks-best-wild-camping-spots/
What you'll need to wild camp will depend on the weather and how close you want to get to nature. It also depends on how long you're out for. But let's assume it's a single overnighter and you can extrapolate from there.
Your basic needs when you stop for the night is food to recover from all the adventurous activities and to fuel up for more tomorrow. You'll also need some degree of shelter from the elements in order to recover and get a good night's sleep. I'll deal with food and cooking next week but for now let's look at shelter.
The greater the degree of shelter and comfort the greater the weight I'm afraid. Less of a problem when you're using something like a canoe or kayak but if you're trekking into your campsite or parachuting in and weight is an issue then you do not want to be carrying the equivalent of a fruit machine on your back. So at the top end is a tent.
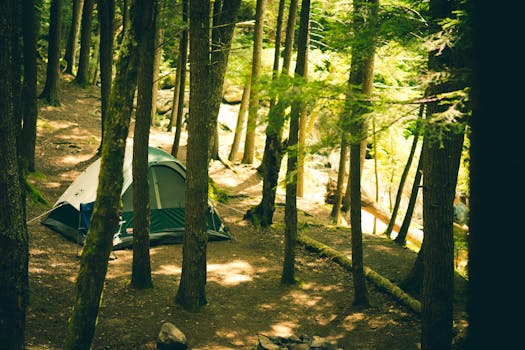
A tent will keep the wind off, the rain off and give a degree of extra warmth and privacy. It's the best option as far as pure shelter is concerned, however, it has disadvantages too. Foremost is its weight. The weight can be shared between your compatriots depending on how big the tent is but it's still relatively heavy, although some very lightweight versions are now available. However, the lighter the tent the weaker it is, usually, which means something that will cope with a high altitude mountain storm will weigh more than something you use on a beach on a summer's night. Tents take time to put up which can be a pain when it's wet, windy, you're tired and just want to go to bed. But the biggest drawback for me is that it removes you from the environment. There is also bulk and I prefer to keep things small and compact, especially if I'm climbing or moving through restrictive terrain (e.g. dense forest or jungle). Although sometimes a tent is essential. If it's minus 30 outside, an eighty mile an hour wind is blowing and it's snowing (which I've experienced) you'll be very grateful for your tent. But normally I like to be out under the stars. So the other option is a bivi.
This consists of a sleeping bag and a bivi bag, which is effectively a waterproof shell for your sleeping bag. This way you can literally sleep under the stars. If it's likely to rain I often take a basha (an Army term) which is just a small tarpaulin that you can set up over you to get the worst of the rain and wind off you. You simply run a line between two trees, lay the tarpaulin over it and secure it to the ground at the corners - so it looks like the roof of a house. The worse the weather the closer you should secure it to the ground to keep drafts out. If there are no trees where you're going you can take two lightweight extendable poles or use your walking poles.
The final thing to cover is the sleeping mat. The more comfortable they are the heavier they are but that extra thickness also insulated you from the ground, making you considerably warmer, allows you to sleep on rockier ground and will allow for a better night's sleep. People are divided on this and it may depend on how long you are out for whether you can cope with less quality to your sleep but I'm a fan of sleeping well when I'm out. A little extra weight is worth the chance to recover properly during the night. The foam, inflatable mats are good. They are comfortable and warmer for their weight but expensive and can be punctured so require more looking after. The simple foam mats are very cheap and won't puncture but are less comfortable, warm and are bulky. My final top tip is, if you're bivi-ing, stick your mat inside your bivi bag. It'll keep it dry and stop you sliding off it. However, a word of caution, if the ground has sharps on it (sharp stones, sticks or bits of wire, rubbish, etc ( I've had to camp on a beach with broken glass over it once while sea kayaking)) put the mat (ideally a non-inflaltable one) on the bottom - they are much cheaper to replace than a bivi bag.
You can also consider a hammock. These aren't just for the jungle, I've used them in Scotland. You can string it between two trees, still rig your basha over the top if it's raining (although you need some extra string to tie to the corners and extend it to your ground anchors) and you won't need a mat to sleep on, thereby saving weight as a hammock weighs much less than a mat. However, the lack of mat can reduce the insulation on your back as you're lying, and crushing, your sleeping bag. I'll often pack the hammock with my clothes to overcome this: wet clothes on the outside of the bivi bag, dry ones on the inside. Obviously if there are no trees of rocks to hang a hammock it's not a great option.
And finally consider your site. Try and get out of the wind, find an area where the ground is not wet or likely to become wet (I knew someone who camped in a ditch. Dry and sheltered from the wind but when it rained during the night it became a stream...). Look for a patch of flat and even ground, sloping ground will have you waking up all night, and clear away any rocks, sticks or debris. A little time in site selection and preparation will pay dividends when you climb into bed.
Oh and one very last point - dry bags. If you only buy one then buy one big enough for your sleeping bag...in fact buy two and double bag it. If every other bit of kit gets a soaking then one piece that must stray dry is your sleeping bag. Trust me.
One of the simplest, most accessible and most rewarding adventures we can have is Wild Camping.
Anyone, regardless of age and ability, can have a go at this and it needn't require great long hike into the remote wilds of the Scottish Highland.
First of the legal side of things. Wild camping is not permitted by law in England, Wales and Northern Ireland (but is also classed as a civil not a criminal offence) unless participants have permission from the landowner (there will always be someone as all land in these countries is owned). However, practically a number of places tolerate wild camping as long as a code of ethics is adhered to. Good examples of these locations are Snowdonia and the Lake District National Parks. Both locations' official websites have pages dedicated to dealing with the issue of wild camping and his allowance along with details of the codes of practice one should stick to.
Snowdonia. (Frequently Asked Question - currently the 5th questions down deals with wild camping)
Dartmoor: Dartmoor is exceptional in that wild camping is actually actively allowed as long as the group size is small (think one or two tents), you spend no more than two consecutive nights on the same spot and you camp more than 100m from public roads, enclosures or other restricted areas. A full map of the areas where you can wild camp under these conditions can be found at the following webpage:
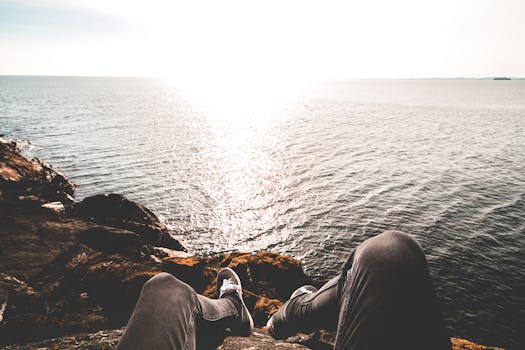
One of my favourite places to wind camp is on beaches. Like the rest of England, NI and Wales it is not permitted unless you have the land-owner permission but these hidden spots are often more accessible than the hills for some people and young children.
Scotland is much more easy going than the rest of the UK and the right to roam applies almost anywhere. You can wild camp in any area of wild land as long as you follow the general code.
The official guide from Scotland's Tourist Department offers some advice:
and you can download the official guide to how you should conduct yourself here.
The only exception to all this is around Loch Lomond where camping is forbidden due to past campers leaving rubbish, damaging the area and generally getting drunk and upsetting the locals. Which goes to prove the freedom to wild camp is a privilege not a right and if we wish to continue to experience the joys it brings we must apply a bit of common sense and respect to our approach.
The most important parts of the general code of conduct are:
-Take all Litter away
-Leave the site as you found it -no holes, no fire damage, no litter, no damage to vegetation. And if you see any litter (even if it's not yours), pick it up and take it home...it's all good karma.
-Minimise disturbance to people and wildlife (camp out of site, minimise noise and light)
-Keep groups small
-Only stay for one night (in some places, e.g. Dartmoor and Scotland, you can stay for more)
-Any toilet duties should be carried out as discretely as possible and should be a minimum of 30m from any water course.
A simple guide of how one should conduct oneself whilst wild-camping can be summarised as:
"If, when you leave in the morning, there is no evidence of your visit and no-one will ever know you've been there then you've probably done things right"
Having dealt with the legal side of things next month I'll look at some of the essential, basic kit you'll need to have a safe and comfortable night out under the stars.
The Dutch Oven will transform your camping experience. If you are outside with the family, you all will be burning calories, even more so if it’s cool. Living off burnt sausages and burgers for more than a day is not the answer. With a Dutch Oven you can get a good warm meal with all the nutrients to refuel the family, preventing some of those “tired and irritable” moments.
1. Dutch Oven: What is it?
A Dutch Oven is a large cast-iron pot. Simple. But, like most simple things, it is really effective.
It is very easy to cook with, and as you can get heat to the food from above and below, it works as an oven, enabling you to stew, boil, fry, bake and roast.
Watch our video that explains how it works:
2. Seasoning your Dutch Oven
Before starting out with your dutch oven you need to season it. This is puts a non-stick coating around your oven, protecting the metal from rust, and making it easier to clean up when on camp.
If new, clean your dutch oven (the only time you do this with water and detergent), and dry it – you don’t want water getting to the cast iron.
Smear a thin layer of unflavoured vegetable fat all over. Inside, outside, lid, legs, handle – everywhere.
Put it on your BBQ. You need to cook the fat into the iron to give it the non-stick coating. You can do this in your oven, but this process smells, so I recommend you do this outside.
Repeat at least twice to ensure all the oven was covered. Do it more if you can as that will give the oven greater protection and it will be easier to clean on site.
You may need to repeat this process (except the first step) at the start of each season.
3. Cooking
Cook with charcoal briquettes. These give a lot more control over the temperature as they are a uniform size (unlike lump wood), and give a relatively consistent heat (compared to a fire).
You don’t necessarily need many, for example, five below and a few on top may be enough for a stew. The more you add the hotter the oven.
You will need to get a supply of briquettes to replace those that burn out. You can place new briquettes next to ones that are still hot, or alternatively, get some started by placing them around the edge of the fire.
To start the initial batch of briquettes off you can use a briquette starter.
Follow this guide to position the briquettes for different types of cooking:
Baking: More heat from top so bottom doesn’t burn. 3/4 coals on top; 1/4 underneath.
Roasting: Heat comes from both top and bottom. 1/2 coals on top; 1/2 coals underneath.
Stewing and simmering: Most heat from bottom. 1/4 coals on top; 3/4 coals underneath.
Frying and boiling: All the coals underneath.
To avoid heat spots, which can cause food to burn, rotate the oven about every 10 minutes. Twist the oven about 1/3 of the way around (lift it, twist it, and place a leg where the previous leg had been). If you have coals on top, twist the lid in the opposite direction.
I also recommend you get some Hot Gloves, a pastry brush for sweeping ash away from the lid before you open it, and a Lid Lifter or suitable hook to lift the lid off without touching it (and it also keeps the coals balanced on there without them falling off!). You should also find something to place the lid down on so it remains upright but not get covered in mud or grass. We use the griddle from our portable BBQ, since that is not in use when we have the oven on it.
Our Dutch Oven plus BBQ set up
4. Cleaning
After serving up the meal, start the cleaning process. This sounds a lot of work but it really isn’t.
Remove all food. Any burnt on food gently scrape away with a wooden spoon. Do not use a metal spoon as that will remove the seasoning.
With the oven cool, add a few inches of water. Never add cold water to a hot oven as it will crack the metal. I recommend leaving your oven to cool and warm some water in the kettle (doesn’t need to be boiling).
Place the lid back on the oven and warm it up. Since the oven is seasoned, this process will pull the food way from the oven’s sides.
Try and get the above going before you eat (it only takes a moment)… then enjoy your food.
Once full (you, not the oven), remove from heat and let cool. Then discard the dirty water and rinse out with warm water. The oven should be clean. If not, repeat.
Dry the oven, then place on a low heat, over the fire, or next to the fire, with the lid slightly off. This will remove any remaining moisture within the pores of the iron.
Finally, before packing it away, use a paper towel and smear unflavoured vegetable oil over the oven to give it a bit more protection. Wipe off any excess.
Never use soap. Detergent will remove your seasoning.
5. Get one
As with most things, you can get Dutch Ovens and related equipment from Amazon.
You can get Dutch Ovens in a number of different sizes (and you can stack them on top of one another too if you need to cook more things with the same set of coals).
When waking up on a cold damp morning, getting the fire going and a warm breakfast is just what’s needed – something you can’t do if you are mainly camping off BBQs.
1lb Sausages (Quorn ones work well as well)
Frozen Hash Browns
12 Eggs (yes, a lot)
1/2 lb Cheddar Cheese
Salt and Pepper
Grate cheese.
Preheat Dutch Oven with coals underneath.
Cut or tear sausages into little pieces and put in oven. Stir until sausage is cooked (or just heated through if using precooked sausages).
Add the hash browns. Stir and fry until hash browns are browned.
Remove from coals. Mix eggs and pour over the top of the sausage and potato base. Season with salt and pepper.
Cover Dutch Oven and add coals to the lid to cook the eggs from above.
When eggs are cooked, sprinkle cheese, cover and cook for 5 minutes to melt the cheese.
Pizza Casserole
This is a creative meal.
2 packs of rolls
Cheddar Cheese
Mozzarella Cheese
Jar of pizza sauce
Mince
Grate the cheese (or slice mozzarella).
Brown the mince in Dutch Oven then remove. Let the oven cool.
Line the bottom of the oven with 1 pack of rolls – can use sliced bread if rolls are not available.
Spread pizza sauce over rolls. Add mince. Add cheese. Add the remaining pack of rolls to the top. Bake (i.e. most of the coals on top) for 30-40 minutes.



 First aid/repair kit. You’ll need a few bandages and plasters, but don’t take a load of stuff unless you know what it’s for! I find that some painkillers and antacid tablets useful as well (and unlike the plasters, likely to be used). Some cream for bites is useful as is a bag of talc that you can fit your foot into. After a long walk when your feet are sore and hot, you’ll understand! Depending on time of year, a midge net is light but essential. Antibacterial gel is useful and can save you from a dodgy stomach, not pleasant in the wilds. Spare laces might be useful, or some spare guyline. Finally some needle and strong thread, gaffer/duck tape and a few assorted cable ties mean that you’ll be more inventive than McGyver. Some basic toiletries – soap, toothbrush and toothpaste should be enough, depending how long you’re going to be in the wilds. A small microfibre towel is worth carrying as well. You’re probably better off growing a beard rather than taking shaving stuff, and that goes for the men too.